Skip the long lines and savor the taste of homemade goodness with our Easy Orange Scones Recipe. These tender and tangy scones go above and beyond, surpassing the orange scone from Panera ரொட்டி.
எந்தவொரு பேக்கிங் நிபுணத்துவத்திற்கும் பொருத்தமான நேரடியான வழிமுறைகளுடன், உங்கள் சமையலறையில் இந்த மகிழ்ச்சிகரமான விருந்துகளை நீங்கள் சிரமமின்றி செய்யலாம். Whether enjoyed for breakfast, as a satisfying snack, or as the star of your brunch table, our Easy Orange Scones will impress and leave everyone wanting more.

For even more tasty scone recipes, be sure to explore our delicious variations. We offer an extensive selection of scone recipes, with new ones frequently being added. There's truly nothing better than the aroma of freshly baked scones to accompany your coffee.☕️🤤 Our classic scones can be customized to your taste, whether you prefer a sweet or savory base.
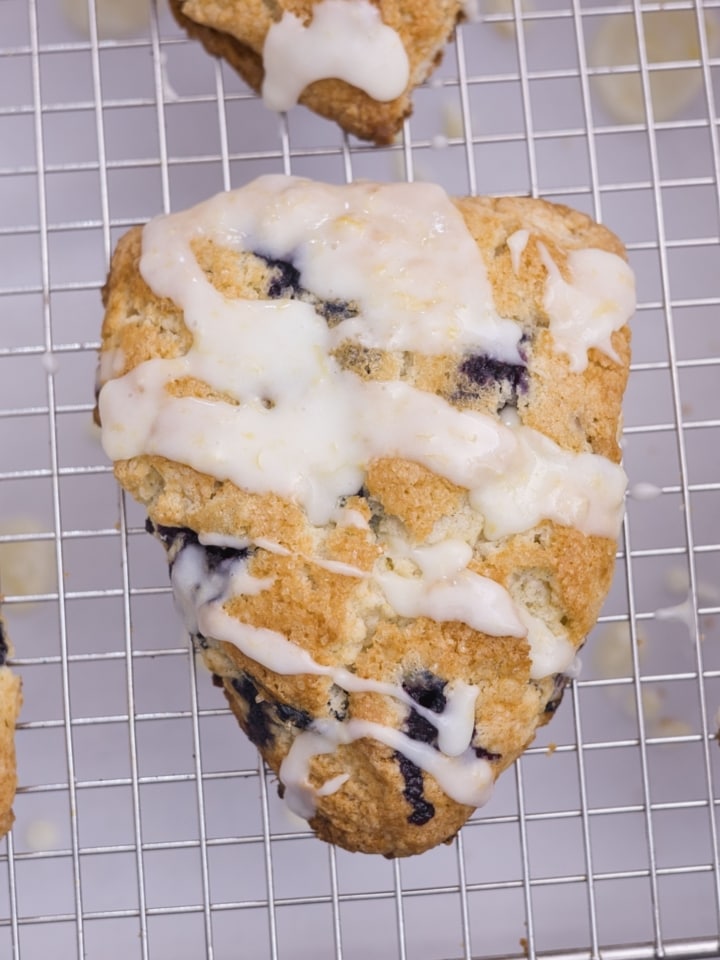
எங்களின் வாயில் ஊறும் எலுமிச்சை மற்றும் ஜூசி அவுரிநெல்லிகளின் தவிர்க்கமுடியாத கலவையுடன் உங்களை மகிழ்விக்கவும் எலுமிச்சை புளுபெர்ரி ஸ்கோன்ஸ். ஒவ்வொரு கடியும் ஒரு சிட்ரஸ் சுவை மற்றும் இனிப்பு சமநிலையுடன் வெடிக்கிறது. சாக்லேட் பிரியர்களுக்கு, எங்கள் ரசனைக்குரியது சாக்லேட் சிப் ஸ்கோன்ஸ் உங்கள் ஆசைகளை பூர்த்தி செய்வது உறுதி. வசந்தத்தின் மகிழ்ச்சிகரமான சுவைக்காக, நாங்கள் மிகவும் பரிந்துரைக்கிறோம் Strawberry Scones with a luscious strawberry shell topping.
நீங்கள் ஏதாவது கவர்ச்சியான மனநிலையில் இருந்தால், எங்கள் வெப்ப மண்டலம் கொய்யா ஸ்கோன்ஸ் தனித்துவமான சுவை அனுபவத்தை வழங்குகிறது. இலையுதிர் காலம் நெருங்கும்போது, எங்களின் பருவகால மகிழ்ச்சிக்கு உங்களை நீங்களே நடத்துங்கள் பூசணி படிந்து உறைந்த பூசணி ஸ்கோன்கள். மேலும் நமது பரலோகத்தை மறந்து விடக்கூடாது வெண்ணிலா ஸ்கோன்ஸ் அது உங்கள் வாயில் வெறுமனே உருகும், மேப்பிள் முழு கோதுமை ஸ்கோன்கள் ஒரு நட்டு திருப்பத்துடன், மகிழ்ச்சிகரமானது முழு கோதுமை வாழை ஸ்கோன்கள் இயற்கை இனிப்புடன் உட்செலுத்தப்பட்டது, மற்றும் தவிர்க்கமுடியாதது தேன் படிந்து உறைந்த முழு கோதுமை புளுபெர்ரி ஸ்கோன்கள். With so many scrumptious scone recipes on our website, we are confident you'll find something to satisfy your cravings.
தாவிச் செல்லவும்:

How to Make Orange Scones
குறிப்பு: முழு வழிமுறைகளும் கீழே உள்ள செய்முறை அட்டையில் வழங்கப்பட்டுள்ளன.அடுப்பை 400°F (200°C)க்கு முன்கூட்டியே சூடாக்கவும். இரண்டு பேக்கிங் தாள்களை காகிதத்தோல் காகிதத்துடன் வரிசைப்படுத்தி ஒதுக்கி வைக்கவும். ஒரு பெரிய கலவை கிண்ணத்தில், அனைத்து நோக்கம் கொண்ட மாவு, பேக்கிங் பவுடர், உப்பு மற்றும் சர்க்கரை ஆகியவற்றை இணைக்கவும். நன்றாக கலக்கு. ஒரு பேஸ்ட்ரி பிளெண்டரைப் பயன்படுத்தி, குளிர்ந்த வெண்ணெயில் கலவையானது கரடுமுரடான நொறுக்குத் தீனிகள் மற்றும் பட்டாணி அளவிலான வெண்ணெய் போன்றவற்றை ஒத்திருக்கும் வரை வெட்டவும்.
மாற்றாக, உலர்ந்த பொருட்களில் குளிர்ந்த வெண்ணெய் தேய்க்க உங்கள் விரல்களைப் பயன்படுத்தலாம். In a separate bowl, whisk together the cold heavy cream, orange juice, Grand Marnier, vanilla, zest, and eggs until combined. Gradually add the wet mixture to the dry mixture, folding until the dough just comes together. It may be a bit crumbly, but that’s perfectly fine. Be careful not to overwork the dough, which can result in tough scones.
மாவை நன்றாக மாவு கொண்ட மேற்பரப்பில் கொட்டவும். ஒட்டாமல் இருக்க மாவின் மேல் சிறிது மாவு தெளிக்கவும். உங்கள் கைகளை மாவு மற்றும் ஒரு பந்தில் மெதுவாக பிசையவும். தோராயமாக 1 அங்குல தடிமன் கொண்ட ஒரு வட்டத்தில் மாவை அழுத்தவும், வேலை செய்யும் மேற்பரப்பில் ஒட்டிக்கொள்வதைத் தடுக்க தேவைக்கேற்ப சிறிது மாவு சேர்க்கவும். ஒரு பெஞ்ச் ஸ்கிராப்பர் அல்லது ஒரு நீண்ட கூர்மையான கத்தியைப் பயன்படுத்தி ஸ்கோன் மாவின் வட்டத்தை 12 ட்ரிங்கிள் வடிவ துண்டுகளாக வெட்டுங்கள்.
துண்டுகளை மேற்பரப்பில் இருந்து தளர்த்த கவனமாக அசைக்கவும், அவற்றை உயர்த்துவதை எளிதாக்குகிறது. ஒரு பெஞ்ச் ஸ்கிராப்பர் அல்லது உங்கள் கைகளைப் பயன்படுத்தி, ஒவ்வொரு துண்டுகளையும் மெதுவாக தூக்கி, தயாரிக்கப்பட்ட பேக்கிங் தாள்களில் வைக்கவும், ஒவ்வொரு ஸ்கோனுக்கும் இடையில் சிறிது இடைவெளி விட்டு விடுங்கள். பேக்கிங்கிற்கு முன் 20 முதல் 25 நிமிடங்களுக்கு ஸ்கோன்களை ஃப்ரீசரில் குளிர வைக்கவும். Preheat the oven to 400ºF. Once chilled, lightly brush the tops of the scones with cream and sprinkle with turbinado sugar if desired.
Bake the scones for 20 minutes, rotating the pans halfway through, until the tops are lightly browned and the insides are fully baked. Remove the Lemon Blueberry scones from the oven and allow them to cool for 15 minutes on the cookie sheet, then transfer them to a cooling rack to cool completely.

ஆரஞ்சு படிந்து உறைவது எப்படி
ஒரு நடுத்தர அளவிலான கிண்ணத்தில், உருகிய வெண்ணெய், தூள் சர்க்கரை, வெண்ணிலா சாறு, ஆரஞ்சு அனுபவம் மற்றும் புதிதாக அழுத்தும் ஆரஞ்சு சாறு ஆகியவற்றை இணைக்கவும். மிருதுவாகவும் நன்கு கலக்கப்படும் வரை கலக்கவும். Drizzle the glaze over the scones. Allow the glaze to set for a few minutes before serving to let it slightly harden. If the glaze seems too stiff to drizzle, warm it in the microwave for 5 to 10 seconds to loosen up.
அதை எப்படி செய்வது என்று பாருங்கள்
மேலும் ஸ்கோன்ஸ் ரெசிபிகளைப் பார்க்கவும்:
- முழு கோதுமை எலுமிச்சை ப்ளூபெர்ரி ஸ்கோன்ஸ்
- கொய்யா ஸ்கோன்ஸ்
- வெண்ணிலா ஸ்கோன்ஸ்
- பூசணி ஸ்கோன்
- சாக்லேட் சிப் ஸ்கோன்ஸ்
- மேப்பிள் ஸ்கோன்ஸ்

ரெசிபி

Easy Orange Scones
Skip the long lines and savor the taste of homemade goodness with our Easy Orange Scones Recipe. These tender and tangy scones go above and beyond, surpassing the orange scone from Panera Bread. With straightforward instructions suitable for any baking expertise, you can effortlessly whip up these delightful treats in your kitchen. Whether enjoyed for breakfast, as a satisfying snack, or as the star of your brunch table, our Easy Orange Scones will impress and leave everyone wanting more.
கருவிகள்
தேவையான பொருட்கள்
For the Orange Scones:
- 500 g (4 கப்) அனைத்து-பயன்பாட்டு மாவு
- 150 g (¾ கப்) தானிய சர்க்கரை
- 2 தேக்கரண்டி பேக்கிங் பவுடர்
- 1 தேக்கரண்டி கோஷர் உப்பு
- 226 (2 குச்சிகள்) குளிர்ந்த உப்பு சேர்க்காத வெண்ணெய் , துண்டுகளாக்கப்பட்டது
- 4 பெரிய முட்டைகள் , லேசாக அடித்தார்
- ¾ கப் குளிர் கனமான கிரீம் , தேவைக்கேற்ப சரிசெய்யவும்
- 2 தேக்கரண்டி புதிதாக அழுத்தும் ஆரஞ்சு சாறு அல்லது பால்
- 1 தேக்கரண்டி கிராண்ட் மார்னியர், அல்லது நீங்கள் விரும்பும் வேறு ஏதேனும் ஆரஞ்சு சுவை கொண்ட மதுபானம் அல்லது புதிதாக அழுத்தும் ஆரஞ்சு சாறு
- 1 தேக்கரண்டி தூய வெண்ணிலா சாறு அல்லது புதிதாக அழுத்தும் ஆரஞ்சு சாறு
- ¼ கப் ஆரஞ்சு அனுபவம்
துலக்க:
- 2 செய்ய 3 தேக்கரண்டி Cream to brush the scones
- 1 தேக்கரண்டி தூவுவதற்கு டர்பினாடோ சர்க்கரை
ஆரஞ்சு படிந்து உறைவதற்கு:
- 130 g (1 கப்) தூள் சர்க்கரை
- 14 g (1 தேக்கரண்டி) உப்பு சேர்க்காத வெண்ணெய், உருகியது
- ½ தேக்கரண்டி தூய வெண்ணிலா சாறு
- 2 தேக்கரண்டி புதிதாக அழுத்தும் ஆரஞ்சு சாறு
- 1 ஆரஞ்சு பழம்
வழிமுறைகள்
For the Orange Scones:
- அடுப்பை 400°F (200°C)க்கு முன்கூட்டியே சூடாக்கவும். இரண்டு பேக்கிங் தாள்களை காகிதத்தோல் காகிதத்துடன் வரிசைப்படுத்தி ஒதுக்கி வைக்கவும். ஒரு பெரிய கலவை கிண்ணத்தில், அனைத்து நோக்கம் கொண்ட மாவு, பேக்கிங் பவுடர், உப்பு மற்றும் சர்க்கரை ஆகியவற்றை இணைக்கவும். நன்றாக கலக்கு. ஒரு பேஸ்ட்ரி பிளெண்டரைப் பயன்படுத்தி, குளிர்ந்த வெண்ணெயில் கலவையானது கரடுமுரடான நொறுக்குத் தீனிகள் மற்றும் பட்டாணி அளவிலான வெண்ணெய் போன்றவற்றை ஒத்திருக்கும் வரை வெட்டவும்.
- Alternatively, you can use your fingers to rub the cold butter into the dry ingredients. In a separate bowl, whisk together the cold heavy cream, orange juice, Grand Marnier, vanilla, zest, and eggs until combined. Gradually add the wet mixture to the dry mixture, folding until the dough just comes together. It may be a bit crumbly, but that’s perfectly fine. Be careful not to overwork the dough, as this can result in tough scones.
- மாவை நன்றாக மாவு கொண்ட மேற்பரப்பில் கொட்டவும். ஒட்டாமல் இருக்க மாவின் மேல் சிறிது மாவு தெளிக்கவும். உங்கள் கைகளை மாவு மற்றும் ஒரு பந்தில் மெதுவாக பிசையவும். தோராயமாக 1 அங்குல தடிமன் கொண்ட ஒரு வட்டத்தில் மாவை அழுத்தவும், வேலை செய்யும் மேற்பரப்பில் ஒட்டிக்கொள்வதைத் தடுக்க தேவைக்கேற்ப சிறிது மாவு சேர்க்கவும். ஒரு பெஞ்ச் ஸ்கிராப்பர் அல்லது ஒரு நீண்ட கூர்மையான கத்தியைப் பயன்படுத்தி ஸ்கோன் மாவின் வட்டத்தை 12 ட்ரிங்கிள் வடிவ துண்டுகளாக வெட்டுங்கள்.
- Carefully wiggle the slices to loosen them from the surface, making it easier to lift them. Using a bench scraper or your hands, gently lift each slice and place them onto the prepared baking sheets, leaving some space between each scone. Chill the scones in the freezer for 20 to 25 minutes before baking. Preheat the oven to 400ºF. Once chilled, lightly brush the tops of the scones with cream and sprinkle with turbinado sugar if desired.
- Bake the scones for 20 minutes, rotating the pans halfway through, until the tops are lightly browned and the insides are fully baked. Remove the Lemon Blueberry scones from the oven and allow them to cool for 15 minutes on the cookie sheet, then transfer them to a cooling rack to cool completely.
ஆரஞ்சு படிந்து உறைவது எப்படி
- In a medium-sized bowl, combine the melted butter, powdered sugar, vanilla extract, orange zest, and freshly squeezed orange juice. Mix until smooth and well combined. Drizzle the glaze over the scones. Allow the glaze to set for a few minutes before serving to let it slightly harden. If the glaze seems too stiff to drizzle, warm it in the microwave for 5 to 10 seconds to loosen up a bit.
குறிப்புகள்
எப்படி சேமிப்பது மற்றும் மீண்டும் சூடாக்குவது
To store your Orange Scones, allow them to cool completely to room temperature. Once cooled, place them in an airtight container or sealable bag. They can be stored at room temperature for up to 3 days or in the refrigerator for up to 5 days.
Orange Scones can be enjoyed at room temperature or straight from the fridge, but if you prefer to warm them before serving, follow these methods for reheating:
ஸ்கோன்களை மீண்டும் சூடாக்க, நீங்கள் தேர்வுசெய்யக்கூடிய சில முறைகள் உள்ளன:
Oven: Preheat your oven to 350°F (175°C). Place the scones on a baking sheet and bake for about 5-10 minutes until warmed through.
Toaster Oven: Slice the scones in half horizontally and lightly toast them in a toaster oven until warm.
Microwave: Place a scone on a microwave-safe plate and heat on medium power for about 10 seconds until warmed. Be careful not to overheat, as the scones can become dry. Remember that reheating can affect the texture slightly, so it’s best to enjoy the scones fresh if possible. எப்படி உருவாக்குவது - முன்னோக்கி Orange Scones can be made a day ahead—store in the refrigerator for up to 5 days. Reheat in a warm oven for 5-8 minutes. Unbaked Orange Scones can be made a day ahead and kept covered in the fridge overnight. Bake directly from frozen, as directed in the recipe, but add 1 to 2 extra minutes to the baking time. எப்படி உறைய வைப்பது Orange Scones can be frozen for up to 3 months. To freeze Scones before baking, make the scones according to the recipe; place the raw scones on a baking sheet, let them freeze until solid, then place them in a freezer-safe bag and press out as much air as possible. Bake directly from frozen, as directed in the recipe, but add 1 to 2 extra minutes to the baking time. To freeze orange scones after baking, let them cool completely and store them in a freezer-safe airtight container or bag for up to 3 months. Before serving, remove the scones from the container and let them come to room temperature; warm them up in the microwave if desired. For the best result, I highly recommend that you freeze them before baking.
ஊட்டச்சத்து உண்மைகள்
Easy Orange Scones
ஒரு சேவைக்கு தொகை
கலோரிகள்
474
% தினசரி மதிப்பு *
கொழுப்பு
24
g
37
%
நிறைவுற்ற கொழுப்பு
14
g
88
%
டிரான்ஸ் கொழுப்பு
1
g
பல்நிறைந்த கொழுப்பு
1
g
கொழுப்பு
6
g
கொழுப்பு
122
mg
41
%
சோடியம்
438
mg
19
%
பொட்டாசியம்
109
mg
3
%
கார்போஹைட்ரேட்
59
g
20
%
இழை
2
g
8
%
சர்க்கரை
25
g
28
%
புரத
7
g
14
%
வைட்டமின் A
843
IU
17
%
வைட்டமின் சி
7
mg
8
%
கால்சியம்
157
mg
16
%
இரும்பு
3
mg
17
%
* சதவீதம் தினசரி மதிப்புகள் ஒரு 2000 கலோரி உணவு அடிப்படையாக கொண்டவை.
அனைத்து ஊட்டச்சத்து தகவல்களும் மூன்றாம் தரப்பு கணக்கீடுகளை அடிப்படையாகக் கொண்டவை மற்றும் ஒரு மதிப்பீடு மட்டுமே. நீங்கள் பயன்படுத்தும் பிராண்டுகள், அளவிடும் முறைகள் மற்றும் ஒரு வீட்டிற்கான பகுதி அளவுகள் ஆகியவற்றைப் பொறுத்து ஒவ்வொரு செய்முறையும் ஊட்டச்சத்து மதிப்பும் மாறுபடும்.
நீங்கள் செய்முறையை விரும்பினீர்களா?நீங்கள் மதிப்பிட்டால் நாங்கள் பாராட்டுவோம். மேலும், எங்கள் சரிபார்க்கவும் யூடியூப் சேனல் மேலும் சிறந்த சமையல் குறிப்புகளுக்கு. தயவு செய்து அதை சமூக ஊடகங்களில் பகிர்ந்து எங்களைக் குறியிடவும், இதன் மூலம் உங்கள் சுவையான படைப்புகளை நாங்கள் பார்க்கலாம். நன்றி!