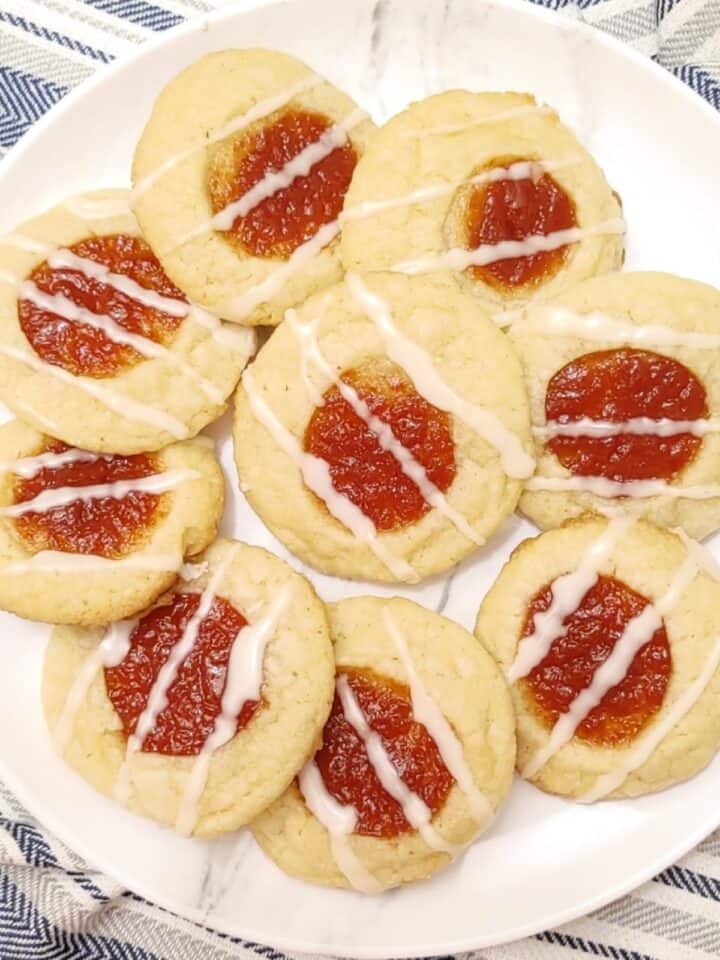
This Paraguayan-inspired Guava thumbprint cookie is delicious for a few reasons. First, the raspberry Guava filling in the center is fruity and flavorful. Second, the sugar cookie dough is buttery and rich. Finally, the cookies have a slight crunch from the vanilla glaze on the outside, making them irresistible.
Jump to:
- What Are Thumbprint Cookies?
- Brief Highlight Of Our Thumbprint Cookies Recipe:
- Guava Thumbprint Cookies Ingredients
- Tools you'll need
- How to Make Guava Thumbprint Cookies
- How to Make Vanilla Glaze
- Substitutions
- Variations
- How to Serve
- How to Store & Re-Heat
- Make-Ahead
- How to Freeze
- Tips for Making The Best Guava Thumbprint Cookies
- FAQ
- Why did my thumbprint cookies flatten?
- More Guava-Inspired Recipes:
- 📋 Recipe
What Are Thumbprint Cookies?
Brief Highlight Of Our Thumbprint Cookies Recipe:
Taste: These cookies offer a delightful combination of flavors. The buttery sugar cookie dough provides a rich and sweet base, while the guava filling adds a fruity and slightly tangy note. The vanilla glaze on top adds an extra layer of sweetness and a hint of vanilla flavor. Together, these elements create a well-balanced and scrumptious treat.
Texture: The cookies have a crumbly and tender texture, thanks to the butter and sugar in the dough. The guava filling in the center provides a slightly chewy and fruity contrast to the cookie's texture. The vanilla glaze on top adds a smooth and sweet finish. Overall, these cookies have a delightful mix of textures that make each bite satisfying.
Method: Making these Guava Thumbprint Cookies involves creating a simple sugar cookie dough, rolling it into balls, and pressing an indentation in the center of each cookie. You then fill the indentations with guava preserve and bake until golden brown. Finally, a quick vanilla glaze is drizzled on top to add a finishing touch. The recipe is straightforward and accessible for both beginner and experienced bakers.
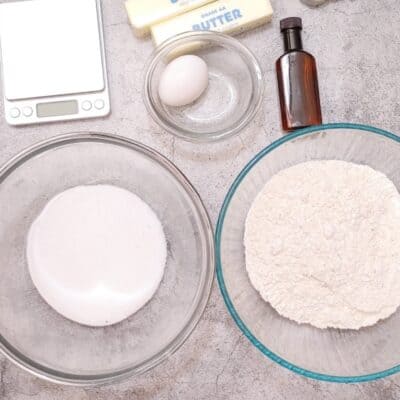
Guava Thumbprint Cookies Ingredients
Note: The full ingredients list is provided in the recipe card below.
- Unsalted Butter: It gives richness, tenderness, and structure to cookies.
- Granulated Sugar and light Brown Sugar: It is a sweetener and provides flavor. It also helps to create a tender and rustic texture.
- Pure vanilla extract and Clear Vanilla: It enhances the flavor.
- All-purpose flour: It creates structure and helps bind the other ingredients together, creating a more consistent cookie.
- Guava Preserve: Instead of guava preserves, fill the cookies with your favorite jam or other delicious spread before baking or halfway through. Avoid using jelly, which tends to melt and spread.
- Eggs: It adds structure, leavening, color, and flavor.
- Baking Powder: It helps the cookies rise.
- Confectioners’ sugar and Heavy Cream: For the vanilla glaze.
Tools you'll need
- Baking sheets
- Medium bowl
- Stand mixer
- Dry measuring cups and spoons
- Liquid Measuring Cup
- Parchment paper
How to Make Guava Thumbprint Cookies
Note: The full instructions are provided in the recipe card below.
Sift the flour and baking powder in a medium bowl and set aside. (Alternatively, use 280g of self-raising flour in this recipe and leave out the baking powder and salt).
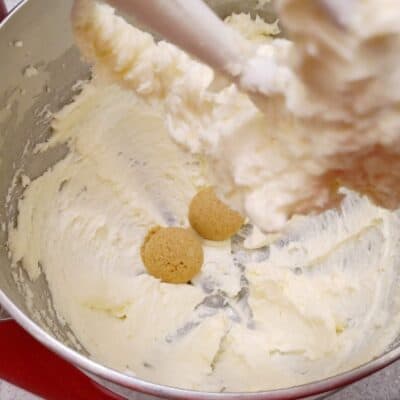
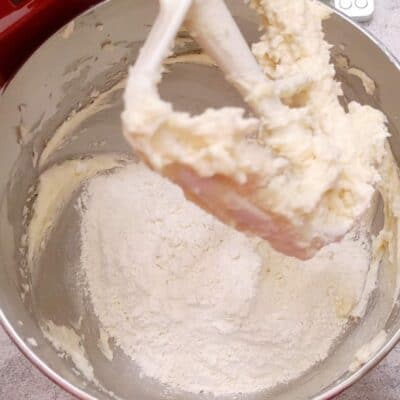
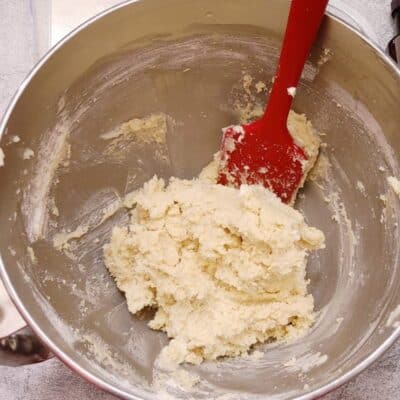
Using a hand or stand mixer with a paddle attachment in a large bowl, cream the butter, sugar, pure vanilla extract, zest, and salt quickly until creamy, about 3 minutes. Switch the mixer to medium speed, add the eggs, one at a time, and beat until combined. Scrape down the sides and the bottom of the bowl as needed. Fold in the dry ingredients until just incorporated. Cover tightly and chill the cookie dough for at least 1 hour and up to 3 days.
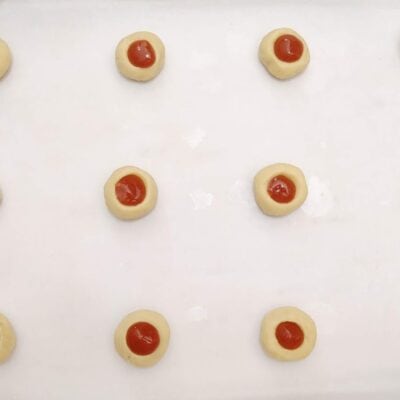
Position racks in the upper and lower thirds of the oven and preheat to 350°F. Line 2 baking sheets with parchment paper; set aside. Once firm, roll the dough into 1-inch balls and arrange ½ inch apart on the prepared baking sheets; chill the cookies for at least 15 to 30 minutes in the freezer.
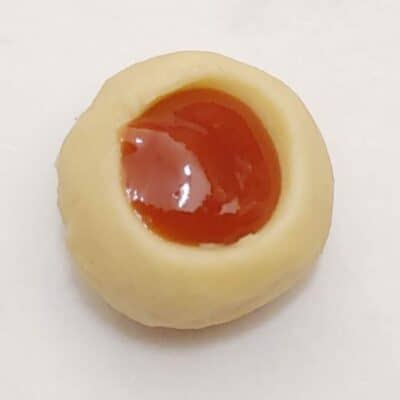
Bake cookies for 6 minutes, remove them from the oven, and use your thumb to press a slight indentation into the center of each cookie. Fill each indentation with about a teaspoon of Guava Preserve and return to the oven. Continue baking until cookies are golden brown, about 10 to 24 minutes longer. Allow to cool on the baking sheets for 5 minutes, then remove to a wire rack to cool completely before glazing. Store the Guava Thumbprint Cookies in an airtight container at room temperature for up to 3 days or in the refrigerator for up to a week.
How to Make Vanilla Glaze
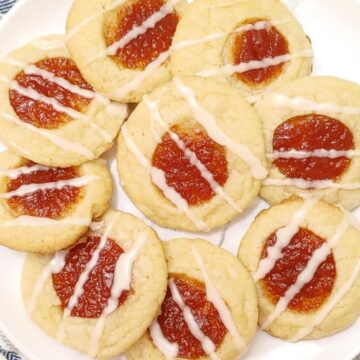
Whisk the glaze ingredients together until smooth. Add more liquid to thin out or more confectioners’ sugar to thicken to your desired consistency. Drizzle over cooled Guava Thumbprint Cookies. Enjoy!
Substitutions
- Sugar: Instead of granulated, you can use Confectioners' sugar to create a more tender and delicate texture.
- Fruit Preserves: Instead of guava preserves, fill the cookies with your favorite jam or other delicious spread before baking or halfway through. Avoid using jelly, which tends to melt and spread.
- Flour: Instead of all-purpose flour, use 280g of self-rising flour; leave out the baking powder and salt.
Variations
- Chocolate Thumbprint Cookies with Dulce de leche
- Nutella thumbprint cookies
How to Serve
The Guava Thumbprint Cookies are a delightful treat served on a platter or in a cookie jar. Enjoy them as a sweet addition to dessert spreads, afternoon tea, or any occasion.The buttery cookie base, fruity guava preserve, and vanilla glaze create a delicious combination. Pair them with your favorite beverage for a delightful snack, or share them with loved ones.
How to Store & Re-Heat
To store: The Guava Thumbprint Cookies, place them in an airtight container at room temperature for up to 5 days or in the refrigerator for up to a week.
To reheat: Warm them in a low-temperature oven or toaster oven briefly until heated.
Make-Ahead
Thumbprint cookie dough can be made a day ahead and stored in an airtight container in the refrigerator for up to 3 days.
How to Freeze
Thumbprint cookie dough can be frozen for up to 3 months: Drop the cookie dough in heaping tablespoons onto a sheet pan, let them set in the freezer until solid, then place them in a freezer bag and press out as much air as possible. Bake directly from frozen, as directed in the recipe, but add 1 to 2 extra minutes to the baking time.
Tips for Making The Best Guava Thumbprint Cookies
- Use Good-Quality Guava Preserve: The flavor of your cookies largely depends on the quality of the guava preserve you use. Look for one that is made with real fruit and has a natural, fruity sweetness. You can also try making your own guava filling for an extra special touch.
- Chill the Cookie Dough: Chilling the cookie dough is essential. It helps solidify the fats (butter) in the dough, which prevents the cookies from spreading too much during baking. Chilled dough also yields a more tender and flavorful cookie.
- Create a Thumbprint: Use your thumb or the back of a small spoon to make a well in the center of each cookie for the guava preserve. Press gently but not too deep to avoid making a hole through the cookie.
- Uniform Cookie Size: Try to make your cookie dough balls as uniform in size as possible. This ensures that they bake evenly, and all your cookies will be done at the same time.
- Chill Before Baking: After you've made the thumbprints and filled them with guava preserve, chill the cookies in the freezer for a short time (about 15-30 minutes). This helps the cookies hold their shape during baking and prevents excessive spreading.
- Check for Doneness: Since ovens vary, keep an eye on your cookies as they bake. They should be golden brown around the edges when done. Overbaking can result in dry cookies, so it's better to underbake slightly and let them finish setting on the baking sheet.
- Cool Before Glazing: Make sure the cookies are completely cooled before adding the vanilla glaze. This ensures that the glaze sets properly and doesn't become too runny.
- Decorate with Precision: When drizzling the vanilla glaze over the cookies, you can use a fork or a piping bag to achieve more precise and decorative patterns.
- Experiment with Flavors: While guava preserves are traditional for these thumbprint cookies, feel free to experiment with other fruit preserves or jams for different flavor combinations.
FAQ
Can you freeze Guava Thumbprint Cookies?
Plain or decorated Guava Thumbprint Cookies, freeze well for up to 1 month. Allow the glaze to completely set before layering it between sheets of parchment paper in a freezer-safe container for up to 1 month: Thaw in the refrigerator or at room temperature.
Can I use a different type of preserve instead of guava?
You can substitute the guava preserve with any other flavor, such as strawberry, raspberry, or apricot.
Can I omit the lemon zest?
Yes, the lemon zest is optional; you can leave it out.
Can I use self-raising flour instead of all-purpose flour and baking powder?
You can use 280g of self-raising flour instead of all-purpose flour and baking powder. In this case, omit the baking powder and salt from the recipe.
Can I use salted butter instead of unsalted butter?
Unsalted butter in baking recipes is generally recommended, as it gives you better control over the salt content. However, if you only have salted butter, you can use it and reduce the added salt slightly.
How long can I chill the cookie dough?
You can refrigerate the cookie dough for at least 1 hour, but it can be chilled for up to 3 days in the refrigerator.
Why did my thumbprint cookies flatten?
Here are the 4 most common reasons why cookies spread so much.
- The Butter Is Too Soft: Butter is the foundation of delectable cookies. The butter should be left at room temperature for 30 minutes to an hour until it's pliable but still cool. (It should hold a thumbprint with a bit of resistance). When creamed with sugar, room-temperature butter has the right consistency to incorporate air. Because of the trapped air pockets, the Sugar Cookies rise and become fluffy. If the butter is too warm, it will not incorporate enough air, resulting in a lower rise in your cookies. Furthermore, butter that is warmer than room temperature melts in the oven instantly, encouraging the dough to spread quickly with it. A quick fix is to chill the Dough. Refrigerate the remaining dough for one to two hours or until it feels firm. This chills the butter, preventing it from spreading too quickly in the oven. Although your cookies will not be as fluffy as once, they will not turn into pancakes.
- You're Baking on Hot Baking Sheets: After the first batch of Sugar Cookies has been baked, a new batch of dough is transferred to the baking sheet. While the first batch was perfect, the second batch spread a lot, possibly to the point where the cookies fused. What happened? Everything comes back to the butter. Hot baking sheets cause the butter to melt quickly, bringing the dough with it. A quick fix is to Cool the Baking Sheets Under Running Water for a few minutes so they're warm, not screaming hot. Then rinse them off under room temperature water until they're no longer hot to the touch. Then, dry them off and place your Sugar Cookies on the cool sheets.
- Your Oven Is Too Hot: If your Sugar Cookies consistently come out flat, no matter what recipe you use, your oven is probably too hot. Here's what's going on. In an overheated oven, the butter melts quickly before the other ingredients have firmed up into a cookie structure. As a result, as the butter spreads, the entire liquid cookie spreads. A quick fix is to reduce the temperature of your oven and increase the baking time. In the long run, consider purchasing an oven thermometer and keeping it in your oven so you know the exact temperature of your oven. Then you can adjust the heat as needed or consult the oven's manual to learn how to calibrate it.
- Incorrectly Measured Ingredients: If your flour, butter, and sugar ratios are off, the cookie might spread too quickly. This can occur if you aren't precise with your measurements. If your recipe calls for 1 cup of sugar, for example, and you add a slightly heaping cup instead of leveling off the cup precisely, you'll end up with too much. This is because sugar sucks up liquid, and when those cookies bake, it'll release the liquid and cause the cookies to spread out. Likewise, if you use too much butter, the Sugar Cookies will end up flat and greasy. If you use too little flour, the amount of butter and sugar will be proportionally too high, meaning the cookies will spread for the above reasons. A quick fix is to bulk it up a Little. If you used too little flour, stir a couple more tablespoons into the batter. Otherwise, shape your Sugar Cookies and freeze them on the baking sheet until they're solid. Although the cookies might still spread some, the frozen butter will counteract the action. If all else fails, consider repurposing your flattened cookies: crumble them up like ice cream toppings or mix-ins, or stir them into cake batter for a decadent treat.
More Guava-Inspired Recipes:
- Guava Bars
- Cornbread Muffins with Guava
- Cornbread Bundt Cake
- Guava Preserves
- Guava Scones
📋 Recipe
How to Make Guava Thumbprint Cookies
Tools
Ingredients
- 270 g all-purpose flour
- 10 g baking powder
- 125 g unsalted butter , softened to room temperature
- 1 large egg , room temperature
- 1 egg yolk , room temperature
- 100 g granulated sugar
- 25 g light brown sugar
- 30 ml (2 tablespoons ) pure vanilla extract
- Zest from ½ of lemon , optional
- ¼ teaspoon kosher salt
- 200 g Guava Preserve or any flavor you like
For the Vanilla Glaze:
- 120 g confectioners’ sugar
- 15-30 ml heavy cream evaporated milk or milk
- 1 teaspoon pure vanilla extract
Instructions
- In a medium bowl, sift together the flour and baking powder and set aside. (Alternately, you can use 280g of self-raising flour in this recipe, and leave out the baking powder and salt).
- Using a hand mixer or stand mixer with a paddle attachment in a large bowl, cream the butter, sugar, pure vanilla extract, zest, and salt on high speed until creamy, about 3 minutes. Switch mixer to medium speed and add the eggs, one at a time and beat until combined.
- Scrape down the sides and the bottom of the bowl as needed. Fold in the dry ingredients until just incorporated. Cover tightly and chill the cookie dough for at least 1 hour and up to 3 days.
- Position racks in the upper and lower thirds of the oven and preheat to 350°F. Line 2 baking sheets with parchment paper; set aside.
- Once firm, roll the dough into 1-inch balls and arrange ½ inch apart on the prepared baking sheets; chill the cookies for at least 15 to 30 minutes in the freezer.
- Bake cookies for 6 minutes, remove them from the oven and use your thumb to press a slight indentation into the center of each cookie. Fill each indentation with about a teaspoon of Guava Preserve and return to the oven. Continue baking until cookies are golden brown, about 10 to 24 minutes longer.
- Allow to cool on the baking sheets for 5 minutes, then remove to a wire rack to cool completely before glazing. Store the Guava Thumbprint Cookies in an airtight container at room temperature for up to 3 days or in the refrigerator for up to a week.
Notes
All nutritional information is based on third-party calculations and is only an estimate. Each recipe and nutritional value will vary depending on the brands you use, measuring methods, and portion sizes per household.