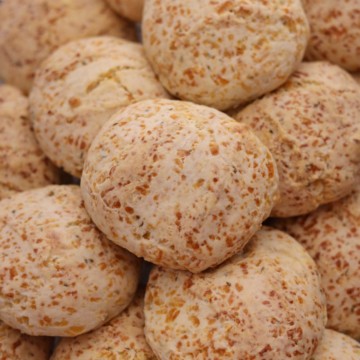
Easy Chipa Buns
If you're a fan of cheesy bread, then you need to try the Paraguayan Inspired Chipa Buns or cheese buns, a perfect twist on the classic Paraguayan Chipa. Made with a blend of tangy cheeses and a subtle hint of anise seeds, these buns offer an utterly unique and irresistible flavor combination that you won't find anywhere else.
Ingredients
- 250 g Tapioca starch
- 250 g self-raising flour
- 2 large eggs , room temperature
- 80 g butter softened to room temperature
- 300 g Mexican 4 cheese , shredded
- 1 tablespoon baking powder
- 1 tablespoon anise seeds
- ¾ cup buttermilk or whole milk, room temperature
Instructions
- Preheat the oven to 375°F. In a large mixing bowl, combine the yuca starch or tapioca starch, salt, self-rising flour, and baking powder. Rub the anise seeds between your palms to release the flavor, then add them to the mixing bowl and stir to combine.
- Place the yuca starch mixture on a clean work surface and make a hole in the center. Add the softened butter and eggs to the hole, then use your fingers to mix the wet ingredients together until somewhat incorporated. Begin to incorporate the yuca starch mixture into the wet mixture a little at a time until a crumbly dough forms. Add the shredded cheese and mix with your hands until everything is well mixed. Drizzle the buttermilk or whole milk a bit at a time, mixing with your hands until a compact and moist but not wet dough has formed.
- Use the heel of your hand to smear the dough away from you until it finishes, then gather it back together with a bench scraper and continue kneading until it becomes smooth and compact and easily detaches from the working surface and your hands. This process should take about 4 to 5 minutes. When done, the dough should have the consistency of smooth playdough. Once you've achieved the perfect consistency, cover the dough with a clean kitchen towel and let it rest for at least 15 to 20 minutes before shaping. This resting time will allow the dough to relax and improve the texture of your final product.
- Cover the dough with a clean kitchen towel and let it rest for at least 15 minutes. Divide the dough into 12 equal portions (about 125g each) and shape each portion into a ball. Place the balls on a greased baking sheet, then gently press down on each ball with three fingers to flatten slightly. Bake the chipa buns in the preheated oven for 30 to 35 minutes or until they are puffed and golden brown. Allow the chipa buns to cool for a few minutes before serving, and enjoy!
Notes
How to Store & Reheat
To store your freshly baked chipa buns, allow them to cool completely to room temperature. Then, wrap them tightly in plastic wrap or store them in an airtight container. They can be stored at room temperature for up to 3 days or in the refrigerator for up to a week. To reheat the chipa buns, preheat your oven to 350°F (175°C). Remove the plastic wrap or the airtight container and place the buns on a baking sheet.
Cover the buns with aluminum foil and bake in the oven for about 5-10 minutes or until heated. Alternatively, you can also reheat the chipa buns in a microwave. Wrap the buns in a damp paper towel and microwave them for 10-15 seconds or until heated through. Be careful not to overheat them, as they may become tough and dry. It is important to note that reheated chipa buns may not be as crispy on the outside as they were when first baked.
However, they will still be delicious and enjoyable.
How to Make Ahead
Prepare the dough according to the recipe instructions and shape it into balls. Instead of baking the buns immediately, place them on a baking sheet and cover them with plastic wrap or a clean kitchen towel. You can then store the unbaked chipa buns in the refrigerator for up to 24 hours before baking or in the freezer for up to 3 months. If stored in the freezer, place the buns in an airtight container or a freezer-safe bag.
When you are ready to bake the chipa buns, remove them from the refrigerator or freezer and allow them to come to room temperature. If frozen, let them thaw in the refrigerator overnight. Once the buns have come to room temperature, follow the baking instructions in the recipe to bake them until they are puffed and golden brown. By following these steps, you can make chipa buns ahead of time and have fresh, delicious bread whenever you want it.
Just remember to store them properly and follow the instructions for reheating if needed.
How to Freeze
Allow the baked chipa buns to cool completely to room temperature. Wrap each bun tightly in plastic or aluminum foil to prevent freezer burn and moisture loss. You can also place the buns in a freezer-safe container or bag. Label the wrapped buns with the date of freezing to keep track of their freshness. Place the wrapped buns in the freezer and store them for up to 3 months.
When ready to use the frozen chipa buns, remove them from the freezer and allow them to thaw at room temperature for about an hour. To reheat the thawed chipa buns, preheat your oven to 350°F (175°C). Remove the plastic wrap or foil and place the buns on a baking sheet. Cover the buns with foil and bake in the oven for about 5-10 minutes or until heated.
Nutrition Facts
Easy Chipa Buns
Amount per Serving
Calories
173
% Daily Value*
Fat
10
g
15
%
Saturated Fat
6
g
38
%
Trans Fat
0.2
g
Polyunsaturated Fat
0.4
g
Monounsaturated Fat
3
g
Cholesterol
49
mg
16
%
Sodium
287
mg
12
%
Potassium
47
mg
1
%
Carbohydrates
16
g
5
%
Fiber
0.1
g
0
%
Sugar
1
g
1
%
Protein
6
g
12
%
Vitamin A
313
IU
6
%
Vitamin C
0.1
mg
0
%
Calcium
210
mg
21
%
Iron
1
mg
6
%
* Percent Daily Values are based on a 2000 calorie diet.
All nutritional information is based on third-party calculations and is only an estimate. Each recipe and nutritional value will vary depending on the brands you use, measuring methods, and portion sizes per household.
Did you Like the Recipe?We would appreciate it if you could rate it. Also, make sure to check out our Youtube Channel for more great recipes. Please share it on social media and tag us so we can see your delicious creations. Thank you!