🎊 Wooo!!!!! It’s a landmark day here at Camila Made, and we're celebrating with The Perfect Homemade Medialunas recipe!!!🎊🧨 Five hundred posts may seem trivial, but for a Medical Assistant and a QC Manager turned food blogger, it’s a huge thing!!!
As you probably know by now, the recipes I share on this site are homemade food that I cook daily for my family, with lots of sweet treats with a healthier side or sometimes just straight-up decadent.
I try to make every recipe as healthy as possible, and I usually succeed.😉However, our sweet tooth always seeks new ways to blur the line between dessert and healthy snacks.
So, to celebrate our landmark day, we're sharing a special recipe we've put together via trial, and error and lots of headaches over the years. However, we've finally cracked our nemesis and are delighted with the result!📌
Nevertheless, getting here has been an exciting journey from what started 2+ years ago to now, 500 posts later, a constantly evolving learning, hard work, time, perseverance, and much patience.
But we wouldn’t have it any other way. However, cooking so closely with my best friend, a.k.a. my husband, has been fascinating. Thank God daily for blessing my life with such a great man by my side; this blog would not be possible without him.
It's hard work, but it’s gratifying to look at something we’ve done together and know all the work, love, and intention behind it.
Let me start by stating that it was never our plan to work together as food bloggers, but my love for baking and cooking inspires him to create a place for me to store all the recipes I’ve collected over the years.
Over time, he also developed a love for cooking and now photography, leading to our passions and professional lives being wrapped up into one.😍
As for me, baking and cooking have been a part of my life for as long as I can remember, so I took what I learned from my mom and grandma and combined it with a lot of my experimentation and failed to develop my recipe style.
My style has changed a lot since then and hopefully will continue to evolve as I do. So, here I leave you the recipe for The Perfect Homemade Medialunas to add some excitement to your morning breakfast without further ado.
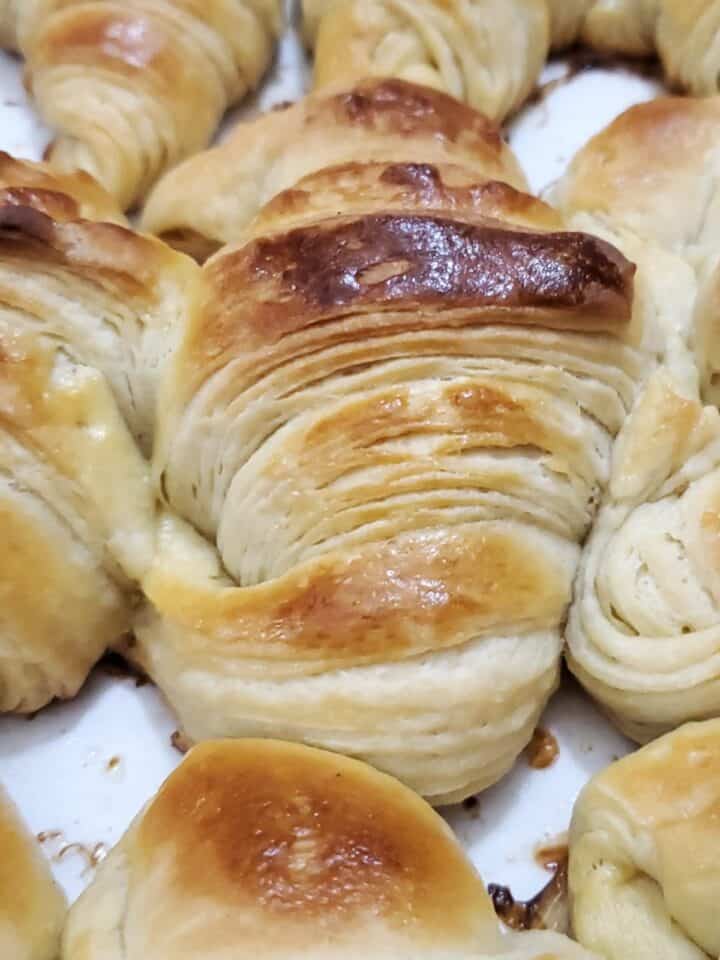
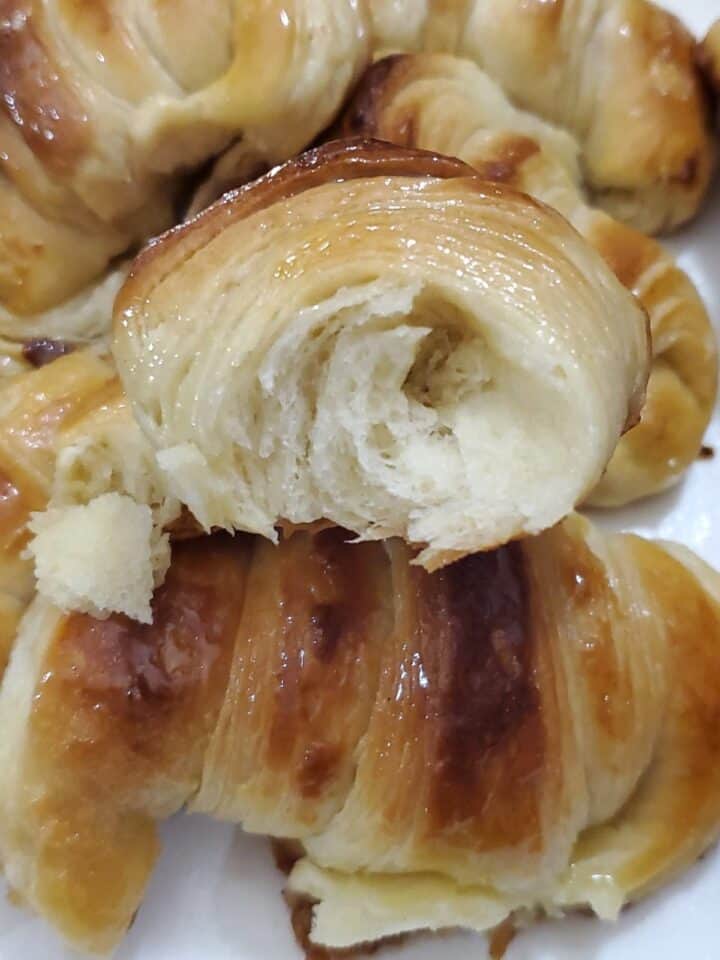
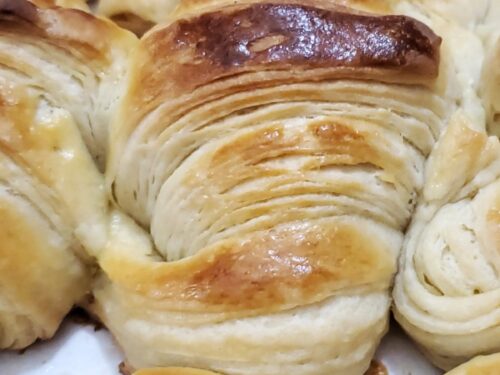
These Medialunas are sweet, light, and full of flavor, just like the famous Medialunas savored in Paraguay and Argentina. Made of a yeast-leavened dough, Medialunas are folded in succession and then rolled into a sheet using laminating.
The process creates a flaky exterior to the sweet bread, like a puff pastry. However, unlike puff pastries, Medialunas have yeast and milk added to the dough, which makes them richer as they rise more.
Enjoy them plain, stuffed with Dulce de leche, Guava paste, chocolate, or pastry cream. Their light and fluffy texture and rich buttery flavor make them an ideal accompaniment to coffee or tea for an enjoyable snack!
I hope you enjoy this recipe as much as my family does!!!! 🥳🎉🎊
How to Make Medialunas
Note: The full instructions are provided in the recipe card below.
Line a baking sheet with parchment paper; set aside. Heat the milk until it is warm (110°F-115 °F). Stir in honey and yeast. Set aside until mixture looks foamy, about 5 minutes.
Add the eggs, sugar, salt, and vanilla extract in a stand mixer bowl. Using the paddle attachment, beat everything while adding the yeast mixture.
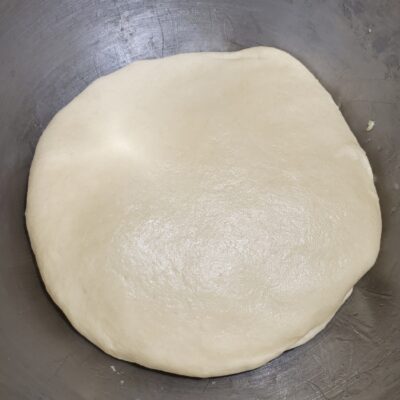
Switch to the dough hook, add the sifted flour, and knead for about 4 minutes; add the softened butter and continue kneading for 3 minutes at low to medium speed until the dough comes together and you've reached the low to moderate gluten development stage.
(A kneading between 8 and 10 minutes is usually enough, although everything will depend on the flour you use).
Don't over-knead dough; you don't want to develop too much gluten because you will struggle to extend the dough during the laminating process.
The final dough has to have a smooth texture with some elasticity, but not too much, and does not have to stick to your hands or the work surface.
When the dough is ready, shape it as a disk and place it on a plate; cover it with a clingfilm wrap to dry it out. Refrigerate for 30 minutes.
While the dough is chilling, place two sticks of cold unsalted butter on a large piece of parchment paper. Cover the butter with another layer of parchment paper, and with a rolling pin, pound the butter until it's about 6'' by 6'' flat square.
Wrap the butter square in parchment paper and refrigerate for 10 minutes or until needed. Remove the dough and the butter square from the refrigerator.
Make sure the dough and the butter have the same consistency and texture; you want the butter to be cold but malleable, meaning you should be able to bend it without breaking it.
If the butter is too soft, it will mix with the dough instead of creating a layer. On the other hand, if the butter is too cold and hard, it will crack, and you won't be able to create layers.
Roll the yeast dough into a 13" by 13" square on a lightly floured surface. If the dough is too cold and firm, rest for a few minutes and roll it out. (Try to get the square as perfect as possible with an even thickness).
Place the butter square in the middle of the rolled-out dough so that its corners point to the center of each side of the rolled-out dough.
Fold the corners of the dough over the butter to meet in the middle and completely enclose the butter layer. Then, with the palm of your hand, lightly press the edges to seal the seams.
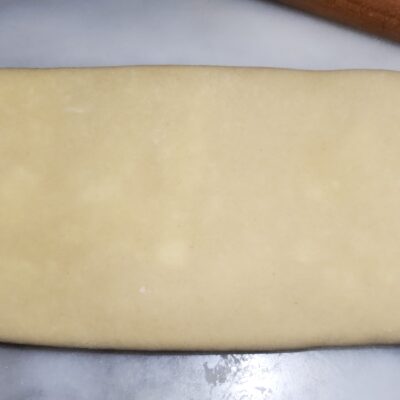
With a lightly floured rolling pin, tap the dough all over, encouraging a rectangular shape on a lightly flour-dusted surface. Once it's pliable, roll the dough into a slightly larger rectangle, about 12" by 16".
Lightly dust with flour on the top of the dough and start rolling from the center of the dough towards the edges and not from the side of the dough to the other side; this technique helps keep the dough at an even thickness.
In addition, you want to rotate your dough 180 degrees to keep it even more.
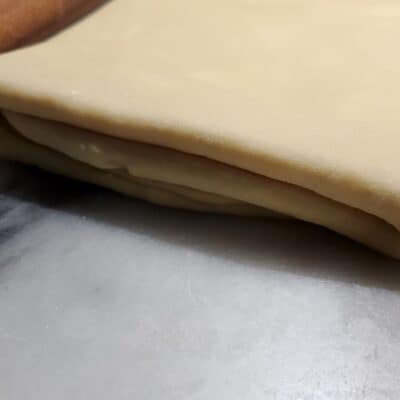
Brush off the excess flour and fold the rectangle of dough into thirds lengthwise, like a letter style. Place the dough on the prepared baking sheet, cover it with plastic wrap, and chill for 30 minutes.
(This is your first turn) Remove the dough from the refrigerator and roll it into a large rectangle again. Brush off the excess flour, fold it into thirds, wrap it with plastic, and return the dough to the fridge.
(This is your second turn) Repeat this procedure 2 more times, for a total of 4 times. After each fold, turn the dough 90 degrees before rolling again. Make sure the open end of the dough faces towards you whenever rolling the dough.
Refrigerate the dough for at least 1 hour or overnight, if possible, before using. The dough is now ready to make Homemade Medialunas or other pastries.
Let the dough soften a bit at room temperature before rolling it out. Line 2 large baking sheets with parchment paper; set aside. On a lightly floured surface, gently roll half of the dough into a large rectangle, about 14" by 18", with a thickness of ¼''.
Cut the dough in half lengthwise. Cut each dough rectangle into triangles, about 5" wide by 7" long. Using a paring knife, make a 1'' notch in the center of the base of each triangle.
This will help the Medialunas curl into a crescent. Now gently pull the corners of the triangles to elongate, about 10''.(The Medialunas dough is easier to manipulate near room temperature).
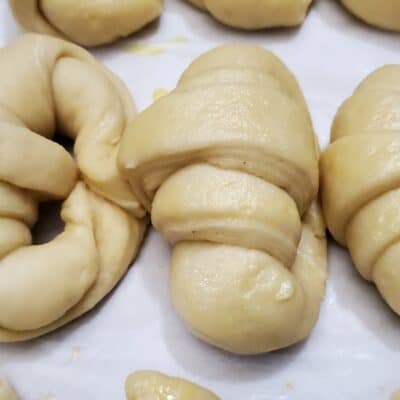
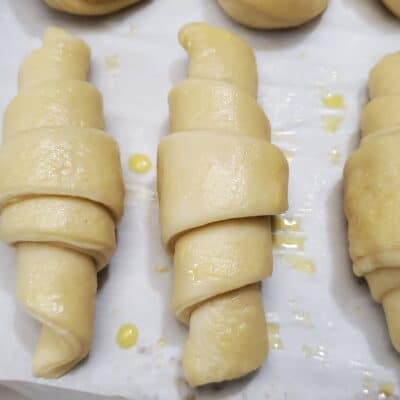
Then, lay the dough on the work surface with the notched side closest to you. With one hand on each side of the notch, roll firmly but not tightly. You want it to hold together but not to be squished together.
Continue to roll, tugging gently back on the already rolled portion to slightly stretch the slack that hasn't been rolled out yet. Do this until you reach the point of the triangle.
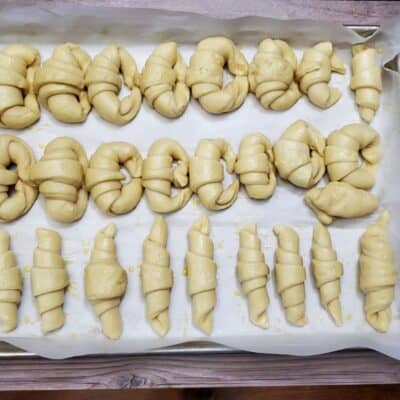
Place the Homemade Medialunas on a baking sheet lined with parchment paper or spray with nonstick cooking oil, curving the ends toward each other and pressing the tips into the baking sheets.
Repeat with the remaining triangles of dough. Whisk the egg with 1 tablespoon of milk, vanilla extract, a pinch of sugar, and salt.
Carefully apply the first brushing of egg wash (brush only the smooth parts of the medialunas and avoid brushing the layers of the medialunas; otherwise, the egg will seal the layers preventing them from expanding;
let the dough rise in a warm place until the medialunas have expended (not significantly, but enough that it is noticeable), about 40 minutes to 1 hour.
Preheat the oven to 375 °F (190.56 °C). Carefully apply the second and final egg wash (again, brush only the smooth parts of the medialunas and avoid brushing the layers of the medialunas; otherwise, the egg will seal the layers preventing them from expanding.
Bake the Medialunas for 17-20 minutes until golden brown. Remove from the oven and brush immediately with the sugar glaze. Serve warm.
In a small saucepan, place the sugar and the water; simmer until the sugar dissolves completely and thickens a bit, about 5 minutes. Remove from heat and stir in the vanilla extract; let it cool. Enjoy!😍😋🥐
Related Recipes:
- Chocolate Pastry cream
- Whole Wheat Cinnamon Rolls
- Guava Preserves
- Pasta Frola
- Churros
- Pastry cream
- Pate sucree
📖 Recipe
Easy Medialunas
Ingredients
- 500 g (4 cups) Flour spooned, leveled off and sifted 2 x
- 100 g (½ cup) granulated sugar
- 166 ml (¾ cup) whole milk or water (110°F-115 °F), avoid using1 %, skim or no-fat
- 4 teaspoons (15g) dry instant yeast
- 1 teaspoon kosher salt
- 2 large Eggs , room temperature
- 2 Tablespoons Pure Vanilla Extract
- 1 Tablespoon Honey
- 2 Tablespoons unsalted butter softened
For the Egg Wash:
- 1 Egg yolk
- ⅛ teaspoon pure vanilla extract
- ⅛ teaspoon sugar
- pinch of kosher salt
- 1 tablespoon milk , cream, or water
For the Sugar Glaze:
- ½ cup Granulated Sugar
- ½ cup Water
- ½ teaspoon Pure Vanilla Extract , optional
Laminating:
- 226 g (1 cup) of Europen Style unsalted butter, cold (Ideally high butter content)
Instructions
- Line a baking sheet with parchment paper; set aside.
- Heat the milk until it is warm (120 °F-130 °F). Stir in honey and yeast. Set aside until mixture looks foamy, about 5 minutes.
- In a stand mixer bowl, add the eggs, sugar, salt, and vanilla extract. Using the paddle attachment, beat everything while adding the yeast mixture. Switch to the dough hook, add the sifted flour, and knead for about 4 minutes; add the softened butter and continue kneading for 3 minutes at low to medium speed until the dough comes together and you've reached the stage of low to moderate gluten development.
- (A kneading between 8 and 10 minutes is usually enough, although everything will depend on the flour you use).
- Don't over-knead dough; you don't want to develop too much gluten because you will struggle to extend the dough during the laminating process.
- The final dough has to have a smooth texture with some elasticity, but not too much, and does not have to stick to your hands or the work surface.
- When the dough is ready, shape it as a disk and place it on a plate; cover with a clingfilm wrap to dry out. Refrigerate for 30 minutes.
- Laminating the Dough: While the dough is chilling, place 2 sticks of cold unsalted butter side by side on a large piece of parchment paper.
- Cover the butter with another layer of parchment paper, and with a rolling pin, pound the butter until it's about 6'' by 6'' flat square. Wrap the butter square in parchment paper and refrigerate for 10 minutes or until needed.
- Remove the dough and the butter square from the refrigerator. Make sure the dough and the butter are at the same consistency and texture; you want the butter to be cold but malleable, meaning you should be able to bend it without breaking it.
- If the butter is too soft, it will mix with the dough instead of creating a layer. On the other hand, if the butter is too cold and hard, it will end up cracking, and you won't be able to create layers.
- Roll out the yeast dough into a 13" by 13" square on a lightly floured surface. If the dough is too cold and firm, allow it to rest for a few minutes and roll it out. (Try to get the square as perfect as possible with an even thickness).
- Place the butter square in the middle of the rolled-out dough, positioned so that its corners point to the center of each side of the rolled-out dough. Fold the corners of the dough over the butter to meet in the middle and completely enclose the butter layer. Then, with the palm of your hand, lightly press the edges to seal the seams.
- With a lightly floured rolling pin, tap the dough all over, encouraging a rectangular shape on a lightly flour-dusted surface. Once it's pliable, roll out the dough to a slightly larger rectangle, about 12" by 16" in size.
- Lightly dust with flour the top of the dough and start rolling from the center of the dough towards the edges and not from the side of the dough to the other side; this technique helps keep the dough at an even thickness. In addition, you want to rotate your dough 180 degrees to keep it even more.
- Brush off the flour excess and fold the rectangle of dough into thirds lengthwise, like a letter style. Place the dough on the prepared baking sheet and cover with plastic wrap and chill for 30 minutes. (This is your first turn)
- Remove dough from the refrigerator and roll it out into a large rectangle again. Brush off the flour excess, fold into thirds, wrap with plastic, and return the dough to the fridge. (This is your second turn) Repeat this procedure 2 more times, for a total of 4 times.
- After each fold, you should turn the dough 90 degrees before rolling again. Make sure the open end of the dough faces towards you whenever rolling the dough. Refrigerate the dough for at least 1 hour or overnight, if possible, before using. The dough is now ready to use to make Homemade Medialunas or other pastries. Let the dough soften a bit at room temperature before rolling it out.
- Line 2 large baking sheets with parchment paper; set aside. On a lightly floured surface, gently roll out half of the dough into a large rectangle, about 14" by 18" with a thickness of ¼''. Cut the dough in half lengthwise.
- Cut each rectangle of dough into triangles, about 5" wide by 7" in length. Using a paring knife, make a 1'' notch in the center of the base of each triangle. This will help the Medialunas curl into a crescent.
- Now gently pull the corners of the triangles to elongate, about 10''.(The Medialunas dough is easier to manipulate when it is close to room temperature). Then, lay the dough on the work surface with the notched side closest to you. With one hand on each side of the notch, and begin to roll firmly but not tightly. You want it to hold together but not to be squished together. Continue to roll, tugging gently back on the already rolled portion to slightly stretch the slack that hasn't been rolled out yet. Do this until you reach the point of the triangle.
- Place the Homemade Medialunas on a baking sheet lined with parchment paper or spray with nonstick cooking oil, curving the ends toward each other and pressing the tips into the baking sheets. Repeat with the remaining triangles of dough.
- Egg Wash: Whisk the egg along with 1 tablespoon of milk, vanilla extract, a pinch of sugar, and a pinch of salt.
- Proofing: Carefully apply the first brushing of egg wash (brush only the smooth parts of the medialunas and avoid brushing the layers of the medialunas; otherwise, the egg will seal the layers preventing them from expanding; let the dough rise in a warm place until the medialunas have expended (not significantly, but enough that it is noticeable), about 40 minutes to 1 hour.
- Baking: Preheat the oven to 375 °F (190.56 °C) Carefully apply the second and final egg wash (again, brush only the smooth parts of the medialunas and avoid brushing the layers of the medialunas; otherwise, the egg will seal the layers preventing them from expanding.
- Bake the Medialunas for 17-20 minutes until golden brown. Remove from the oven and brush immediately with the sugar glaze. Serve warm.
- For the sugar glaze: In a small saucepan, place the sugar and the water; simmer until the sugar dissolves completely and thickens a bit, about 5 minutes. Remove from heat and stir in the vanilla extract; let it cool. Enjoy!😍😋😍😍😍🥐☕
Notes
- Sometimes the medialunas dough will resist getting any longer than 17''... Stop rolling and pressing the dough; it will only hurt your layers.
At any stage, when the rolling of the medialunas dough gets more challenging, cover and let the gluten relax for 10 to 20 minutes in the fridge before continuing.
Store medialunas dough in the refrigerator for up to 2 days. - Be Quick! During each folding and rolling out, try to work as fast as possible so the dough and butter remain as cold as possible. If the dough or the butter gets too warm, place them back into the freezer for a few minutes and wait until they are hard enough to work with again.
Brush off the excess flour; as you fold it in thirds, stretch a bit to get the dough even.
All nutritional information is based on third-party calculations and is only an estimate. Each recipe and nutritional value will vary depending on the brands you use, measuring methods, and portion sizes per household.
