Easy Pao de Queijo
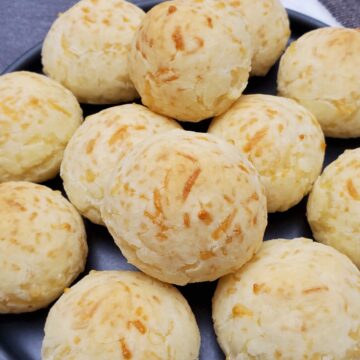
Introducing Pao de Queijo, a beloved Brazilian snack that is crispy on the outside, soft and chewy on the inside, and bursting with cheesy goodness. Made from simple ingredients like tapioca starch, milk, eggs, and Parmesan cheese, these delectable treats are perfect for any occasion. In this recipe, we'll guide you through making Pao de Queijo from scratch so that you can enjoy them fresh and warm right out of the oven. So roll up your sleeves, and let's get baking!
Ingredients
- 1 kg Tapioca Starch
- 500 ml of water
- 500 ml whole milk
- 250 ml sunflower oil or any neutral oil
- 6 large eggs , room temperature
- 3 teaspoons kosher salt
- 300 g shredded Parmesan cheese (don't use the pre-treated Parmesan from a container)
- 153 g shredded mozzarella cheese
Instructions
- Preheat the oven to 400⁰F. Line a (2) 13 by 18 baking sheet with parchment paper.
- In an extra-large bowl, place the tapioca flour in a large mixing bowl and set it aside.
- In a medium saucepan, combine the milk, oil, salt, and water and bring to a boil. Remove from the heat and slowly pour over the tapioca flour in the mixing bowl. Using a wooden spatula, quickly combine the mixture as best as you can. Let it cool down a bit; when the dough is cool enough to touch, add the eggs (one at a time), and mix until incorporated.
- Then add the cheese (a small handful at a time), and knead until you form a soft dough that detaches from the bowl and your hands (think play dough, wet your hands if they become too sticky as you are kneading).
- If you can, chill the mixture in the fridge or freezer for 30-60 minutes – it'll make the next step easier.
- Moisten your hand with oil or water and take a piece of dough (about 50g/ 2 tablespoons) and form it into balls (this process is very laborious because the tapioca starch becomes like a natural glue, but with a bit of patience, you get there) and place the dough out onto the prepared baking sheet, leaving at least 1inch (2.54 cm) between them.
- Bake the Pão de Queijo until they become puffed up and feel light and golden on top, rotating about halfway through baking, about 25 to 30 minutes. Eat warm or at room temperature.
Notes
How to Store & Re-Heat
Storing and reheating Pao de Queijo is easy to do. You can store leftover Pao de Queijo in an airtight container or plastic bag at room temperature for up to 2 days or in the refrigerator for up to a week. If you're storing it in the fridge, allow it to come to room temperature before reheating. To reheat Pao de Queijo, preheat your oven to 350°F (180°C), place the Pao de Queijo on a baking sheet, and bake for about 5-10 minutes or until heated through and slightly crispy on the outside.
If you prefer to use a microwave, reheat for about 10-20 seconds, but keep in mind that this method may result in a softer texture. For those who wish to freeze Pao de Queijo, you can do so for up to 2 months. Place the baked Pao de Queijo in a single layer on a baking sheet and freeze until solid, then transfer to an airtight container or plastic bag. When ready to eat, thaw the Pao de Queijo in the refrigerator overnight and reheat using the instructions above.
Make-Ahead
Making Pao de Queijo ahead of time can be a convenient and time-saving option. To do so, prepare the dough according to the recipe instructions, form the dough into balls, and place them on a baking sheet lined with parchment paper. Next, cover the baking sheet with plastic wrap and place it in the freezer until the Pao de Queijo is frozen solid. Once frozen, transfer the Pao de Queijo to an airtight container or plastic bag and store them in the freezer for up to 2 months.
When ready to bake, preheat your oven to 400°F (200°C), arrange the frozen Pao de Queijo on a baking sheet lined with parchment paper, leaving about an inch of space between them, and bake for 25-30 minutes, or until puffed up and golden brown on top. By making Pao de Queijo ahead of time and freezing them, you can have a delicious snack or side dish ready to go whenever you need it, without the hassle of making the dough from scratch.
How to Freeze
Freezing Pao de Queijo is a great way to enjoy this snack anytime you want without making the dough from scratch. To freeze Pao de Queijo, prepare the dough according to the recipe instructions, form the dough into balls, and place them on a baking sheet lined with parchment paper. Place the baking sheet in the freezer until the Pao de Queijo is frozen. Once frozen, transfer the Pao de Queijo to an airtight container or plastic bag, and label the container or bag with the date and contents.
Store the Pao de Queijo in the freezer for up to 2 months. To thaw the frozen Pao de Queijo, remove them from the freezer and let them sit at room temperature for about 30 minutes before reheating them in the oven. Freezing Pao de Queijo is an easy and convenient way to have this delicious snack on hand anytime you want it, and it's an excellent option for those who want to make a large batch ahead of time.
Notes:
- If your dough is too soft to mold, chill it in the fridge for about 30 minutes or longer to let it firm up.
- Pão de queijo becomes light and airy when baked; that's when you know it's done.
Nutrition Facts
Easy Pao de Queijo
Amount per Serving
Calories
160
% Daily Value*
Fat
8
g
12
%
Saturated Fat
2
g
13
%
Trans Fat
0.002
g
Polyunsaturated Fat
0.4
g
Monounsaturated Fat
5
g
Cholesterol
29
mg
10
%
Sodium
278
mg
12
%
Potassium
36
mg
1
%
Carbohydrates
19
g
6
%
Sugar
1
g
1
%
Protein
4
g
8
%
Vitamin A
117
IU
2
%
Calcium
107
mg
11
%
Iron
0.4
mg
2
%
* Percent Daily Values are based on a 2000 calorie diet.
All nutritional information is based on third-party calculations and is only an estimate. Each recipe and nutritional value will vary depending on the brands you use, measuring methods, and portion sizes per household.
Did you Like the Recipe?We would appreciate it if you could rate it. Also, make sure to check out our Youtube Channel for more great recipes. Please share it on social media and tag us so we can see your delicious creations. Thank you!