
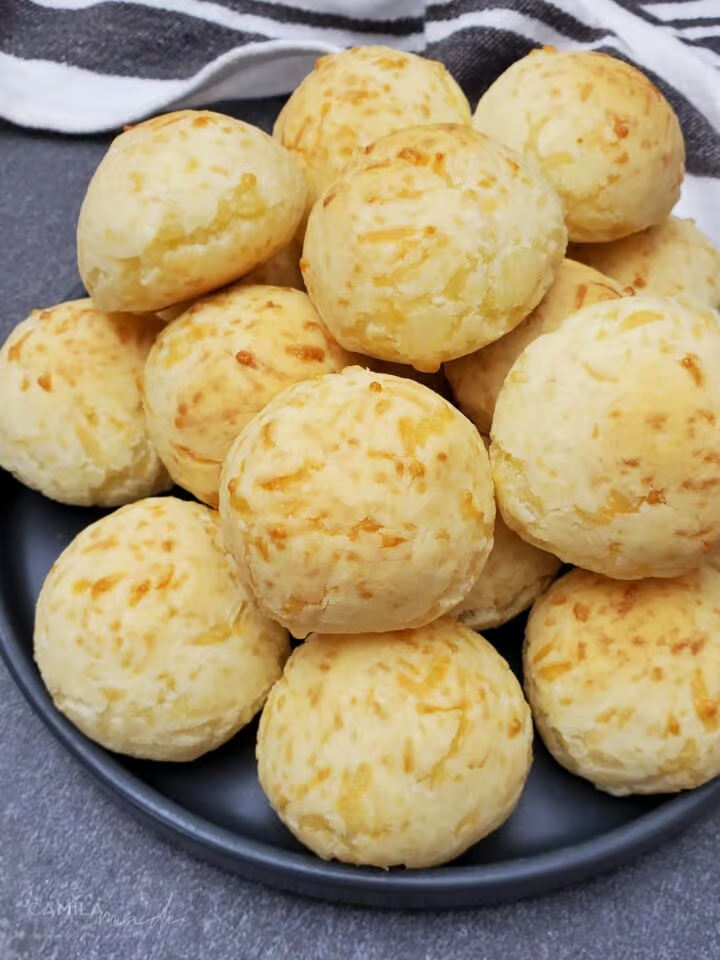
Introducing Pao de Queijo, a beloved Brazilian snack that is crispy on the outside, soft and chewy on the inside, and bursting with cheesy goodness. Made from simple ingredients like tapioca starch, milk, eggs, and Parmesan cheese, these delectable treats are perfect for any occasion. In this recipe, we'll guide you through making Pao de Queijo from scratch to enjoy them fresh and warm right out of the oven. So roll up your sleeves, and let's get baking!
 What is Pao de Queijo?
 What is Pao de Queijo
Jump to:
Pao de Queijo is a popular Brazilian snack made from tapioca starch, milk, eggs, and cheese. It is a small, round bread-like pastry that is crispy on the outside, soft and chewy on the inside, and has a delightful cheesy flavor. Pao de Queijo is a traditional food in Brazil, often served as a breakfast item, snack, or accompaniment to meals. It is also a favorite among gluten-free eaters, as tapioca starch is naturally gluten-free. Whether warm out of the oven or at room temperature, Pao de Queijo is a delicious and satisfying snack that has become well-loved worldwide.
Ingredients
Note: The full ingredients list is provided in the recipe card below.
- Tapioca Starch: Tapioca starch, also known as tapioca flour, is the main ingredient in Pao de Queijo. It gives the snack its unique chewy texture and also makes it gluten-free.
- Water: Water is added to the milk, oil, and salt mixture to bring it to a boil and to help combine it with the tapioca starch.
- Whole Milk: Whole milk makes the dough richer and creamier. It also helps to create a crisp exterior and a soft interior.
- Sunflower Oil or Any Neutral Oil: The oil is used to help make the dough more pliable and easier to work with.
- Eggs: The eggs provide structure to the dough and help it rise. They also add richness and flavor.
- Kosher Salt: Salt is added for flavor and to enhance the cheesy flavor.
- Parmesan Cheese: Shredded Parmesan cheese is added to the dough to give the Pao de Queijo its distinct cheesy flavor.
- Mozzarella Cheese: Shredded mozzarella cheese is added to the dough to enhance the cheesy flavor further and add more moisture.
Tools you'll need
How to Make Pao de Queijo
Note: The full instructions are provided in the recipe card below.
Preheat the oven to 400⁰F. Line a (2) 13 by 18 baking sheet with parchment paper. In an extra-large bowl, place the tapioca flour in a large mixing bowl and set it aside. Boil the milk, oil, salt, and water in a medium saucepan. Remove from the heat and slowly pour over the tapioca flour in the mixing bowl. Using a wooden spatula, quickly combine the mixture as best as possible. Let it cool down; when the dough is cool enough to touch, add the eggs (one at a time), and mix until incorporated.
Then add the cheese (a small handful at a time), and knead until you form a soft dough that detaches from the bowl and your hands (think play dough; wet your hands if they become too sticky as you are kneading). If you can, chill the mixture in the fridge or freezer for 30-60 minutes – it'll make the next step easier.
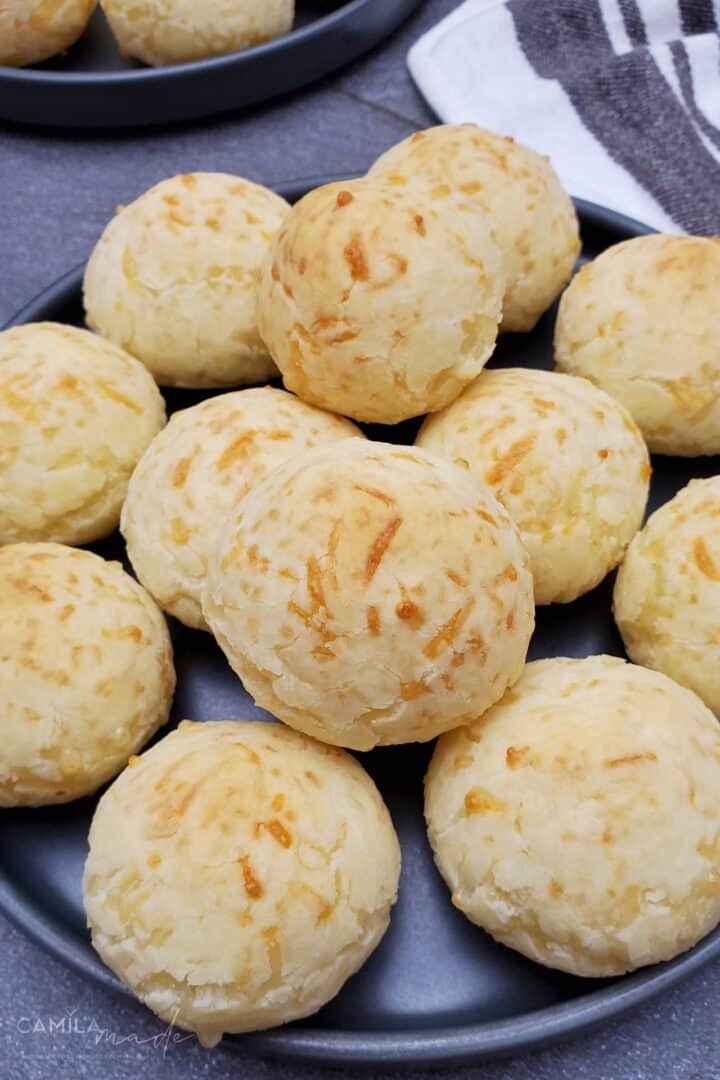
Moisten your hand with oil or water and take a piece of dough (about 50g/ 2 tablespoons) and form it into balls (this process is very laborious because the tapioca starch becomes like a natural glue, but with a bit of patience, you get there) and place the dough out onto the prepared baking sheet, leaving at least 1inch (2.54 cm) between them. Bake the Pão de Queijo until they become puffed up and feel light and golden on top, rotating about halfway through baking, about 25 to 30 minutes. Eat warm or at room temperature.
Substitutions
- Tapioca Starch: While tapioca starch is the main ingredient in Pao de Queijo, you could try using other gluten-free flours, such as cassava flour or potato starch, although the texture and flavor may differ slightly.
- Whole Milk: You can use any milk you prefer, including skim, 1%, 2%, or non-dairy milk like almond or soy milk. Remember that lower-fat milk may produce a less rich and creamy dough.
- Sunflower Oil or Any Neutral Oil: You can use any neutral-flavored oil, such as canola, vegetable, or grapeseed.
- Eggs: If you can't or don't want to use eggs, you can try using a vegan egg substitute, such as a flax egg (1 tablespoon ground flaxseed mixed with 3 tablespoons of water, let sit for 5 minutes) or a commercial egg replacer.
- Cheese: You can use any cheese you prefer, such as cheddar, Monterey Jack, or provolone. Remember that using a different type of cheese may change the flavor and texture of the Pao de Queijo.
Variations
- Spicy Pao de Queijo: Add chopped jalapeños or red pepper flakes to the dough for a spicy kick.
- Herb Pao de Queijo: Mix some dried herbs like oregano, thyme, or rosemary into the dough for a flavorful twist.
- Sweet Pao de Queijo: Instead of Parmesan and mozzarella cheese, use cream cheese and add sugar and vanilla extract for a sweet version.
- Bacon Pao de Queijo: Add cooked and crumbled bacon to the dough for a savory and meaty version.
- Vegan Pao de Queijo: Use vegan substitutes for milk, cheese, and eggs to create a delicious plant-based version of Pao de Queijo.
- Mini Pao de Queijo: Roll the dough into smaller balls and bake them in a mini muffin tin for bite-sized versions of the snack.
- Pao de Queijo Sandwich: Cut the Pao de Queijo in half and use it as a sandwich bread filled with sliced meat or vegetables.
How to Serve
Pao de Queijo is a versatile snack that can be enjoyed in many ways. Whether served warm as a snack or as a side dish alongside soups or salads, Pao de Queijo never fails to satisfy. It can also be a tasty breakfast with fresh fruit, yogurt, and coffee. For party appetizers, arrange Pao de Queijo on a platter with other finger foods for a delicious and crowd-pleasing option. Cutting Pao de Queijo in half and using it as sandwich bread is another creative and tasty way to enjoy this snack.
How to Store & Re-Heat
To store: Pao de Queijo, let them cool completely to room temperature and then transfer them to an airtight container or resealable plastic bag. You can keep them at room temperature for up to 2 days or in the refrigerator for up to 1 week.
To reheat: Pao de Queijo, preheat your oven to 350°F (175°C). Place the Pao de Queijo on a baking sheet and heat them in the oven for 5 to 10 minutes, or until they are heated through and the outside is crisp again. You can also reheat them in the microwave for a few seconds, but be aware that they may become chewy instead of crispy if you do so. Enjoy the warm and cheesy Pao de Queijo!
Make-Ahead
Making Pao de Queijo ahead of time can be a convenient and time-saving option. To do so, prepare the dough according to the recipe instructions, form it into balls, and place them on a baking sheet lined with parchment paper. Next, cover the baking sheet with plastic wrap and place it in the freezer until the Pao de Queijo is frozen solid. Once frozen, transfer the Pao de Queijo to an airtight container or plastic bag and store them in the freezer for up to 2 months.
When ready to bake, preheat your oven to 400°F (200°C), arrange the frozen Pao de Queijo on a baking sheet lined with parchment paper, leaving about an inch of space between them, and bake for 25-30 minutes, or until puffed up and golden brown on top. By making Pao de Queijo and freezing them, you can have a delicious snack or side dish ready whenever you need it, without the hassle of making the dough from scratch.
How to Freeze
Freezing Pao de Queijo is a great way to enjoy this snack anytime without making the dough from scratch. To freeze Pao de Queijo, prepare the dough according to the recipe instructions, form the dough into balls, and place them on a baking sheet lined with parchment paper. Place the baking sheet in the freezer until the Pao de Queijo is frozen. Once frozen, transfer the Pao de Queijo to an airtight container or plastic bag, and label the container or bag with the date and contents.
Store the Pao de Queijo in the freezer for up to 2 months. To thaw the frozen Pao de Queijo, remove them from the freezer and let them sit at room temperature for about 30 minutes before reheating them in the oven. Freezing Pao de Queijo is an easy and convenient way to have this delicious snack on hand anytime you want it, and it's an excellent option for those who want to make a large batch ahead of time.
Tips for Making The Best Pao de Queijo
- Use fresh and high-quality ingredients: Use fresh and high-quality ingredients, especially cheese. Shred the cheese yourself instead of pre-shredded cheese, which may contain additives that affect the final texture and flavor of the Pao de Queijo.
- Let the dough rest: After mixing the ingredients, let the dough rest for at least 10-15 minutes to allow the tapioca starch to absorb the liquid fully.
- Knead the dough well: Knead it until it forms a smooth and elastic texture that detaches from the bowl and your hands.
- Use room temperature eggs: Using room temperature eggs helps the dough to combine more easily and results in a smoother texture.
- Chill the dough before forming it into balls: If it is too sticky to form into balls, chill it in the fridge or freezer for 30-60 minutes to make it easier to handle.
- Use the correct baking temperature: Bake the Pao de Queijo at a high temperature of 400°F (200°C) to achieve a golden and crispy exterior while remaining soft and chewy.
- Don't overbake: Overbaking can result in dry and tough Pao de Queijo. Bake until the Pao de Queijo is puffed up and slightly golden.
FAQ
What is the origin of Pao de Queijo?
Pao de Queijo is a traditional Brazilian snack that originated in the Minas Gerais region of Brazil.
What is tapioca starch, and where can I find it?
Tapioca starch is a type of starch that is made from cassava root. It can be found in most grocery stores, usually in the gluten-free or specialty baking sections.
Can I use different types of cheese in Pao de Queijo?
While Parmesan and mozzarella cheese are traditional in Pao de Queijo, you can experiment with other types of cheese to create your unique version of the snack.
How do I store leftover Pao de Queijo?
Store leftover Pao de Queijo in an airtight container or plastic bag at room temperature for up to 2 days or in the refrigerator for up to a week.
Can I make Pao de Queijo without eggs?
You can make eggless Pao de Queijo using a vegan egg substitute or omitting the eggs altogether. However, keep in mind that the texture may be slightly different.
Related Recipes:
Recipe
Easy Pao de Queijo
Ingredients
- 1 kg Tapioca Starch
- 500 ml of water
- 500 ml whole milk
- 250 ml sunflower oil or any neutral oil
- 6 large eggs , room temperature
- 3 teaspoons kosher salt
- 300 g shredded Parmesan cheese (don't use the pre-treated Parmesan from a container)
- 153 g shredded mozzarella cheese
Instructions
- Preheat the oven to 400⁰F. Line a (2) 13 by 18 baking sheet with parchment paper.
- In an extra-large bowl, place the tapioca flour in a large mixing bowl and set it aside.
- In a medium saucepan, combine the milk, oil, salt, and water and bring to a boil. Remove from the heat and slowly pour over the tapioca flour in the mixing bowl. Using a wooden spatula, quickly combine the mixture as best as you can. Let it cool down a bit; when the dough is cool enough to touch, add the eggs (one at a time), and mix until incorporated.
- Then add the cheese (a small handful at a time), and knead until you form a soft dough that detaches from the bowl and your hands (think play dough, wet your hands if they become too sticky as you are kneading).
- If you can, chill the mixture in the fridge or freezer for 30-60 minutes – it'll make the next step easier.
- Moisten your hand with oil or water and take a piece of dough (about 50g/ 2 tablespoons) and form it into balls (this process is very laborious because the tapioca starch becomes like a natural glue, but with a bit of patience, you get there) and place the dough out onto the prepared baking sheet, leaving at least 1inch (2.54 cm) between them.
- Bake the Pão de Queijo until they become puffed up and feel light and golden on top, rotating about halfway through baking, about 25 to 30 minutes. Eat warm or at room temperature.
Notes
- If your dough is too soft to mold, chill it in the fridge for about 30 minutes or longer to let it firm up.
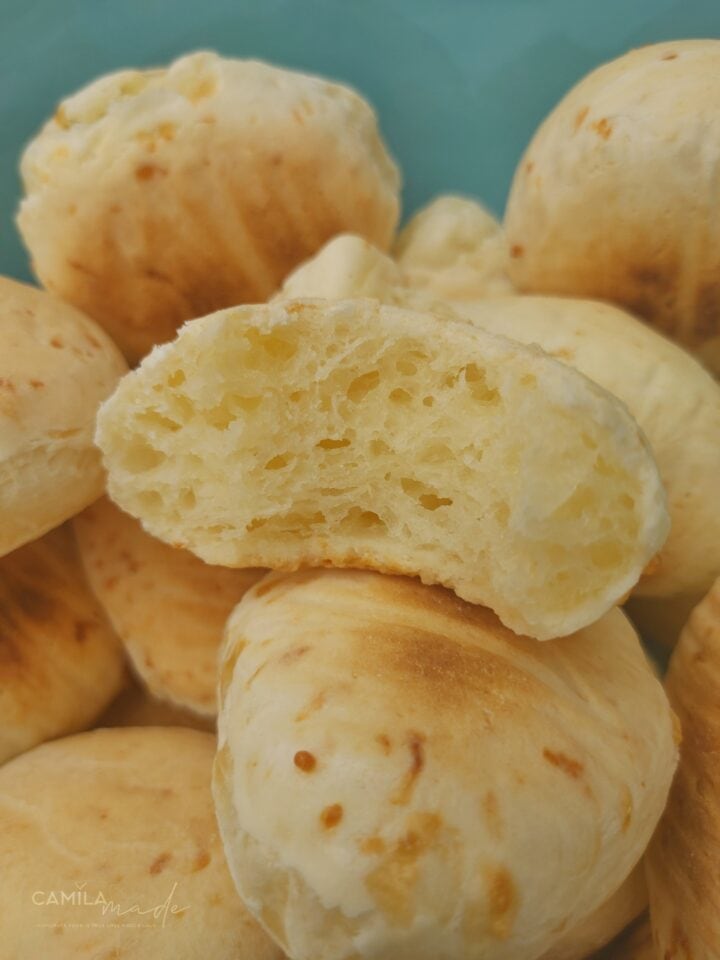
- Pão de queijo becomes light and airy when baked; that's when you know it's done.
All nutritional information is based on third-party calculations and is only an estimate. Each recipe and nutritional value will vary depending on the brands you use, measuring methods, and portion sizes per household.