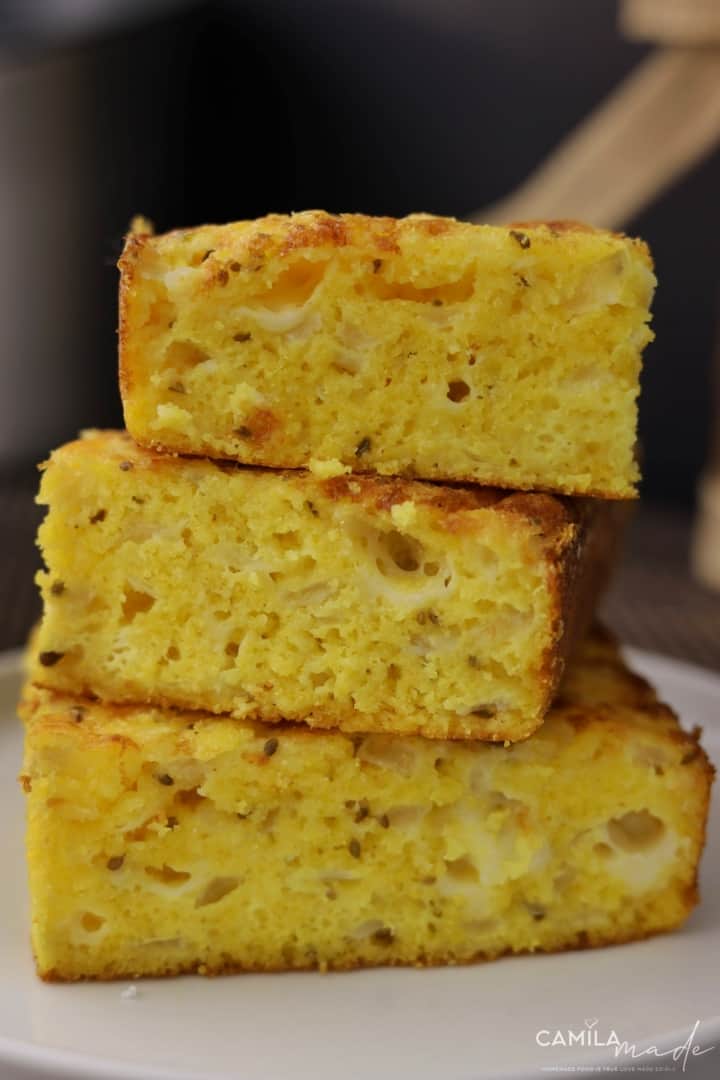
 Sopa Paraguaya
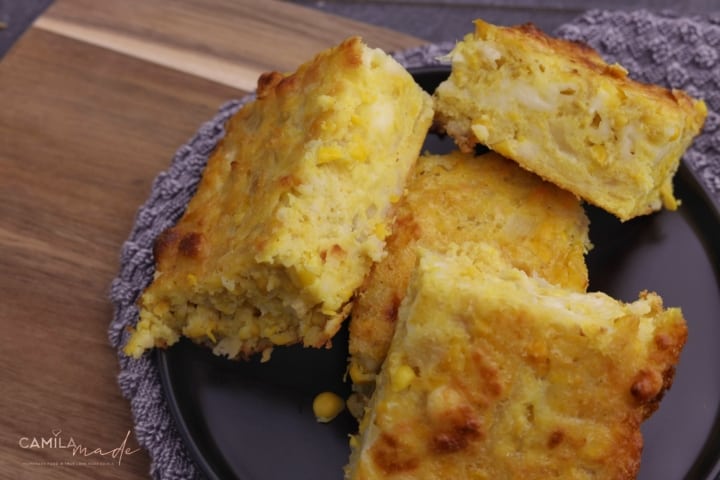
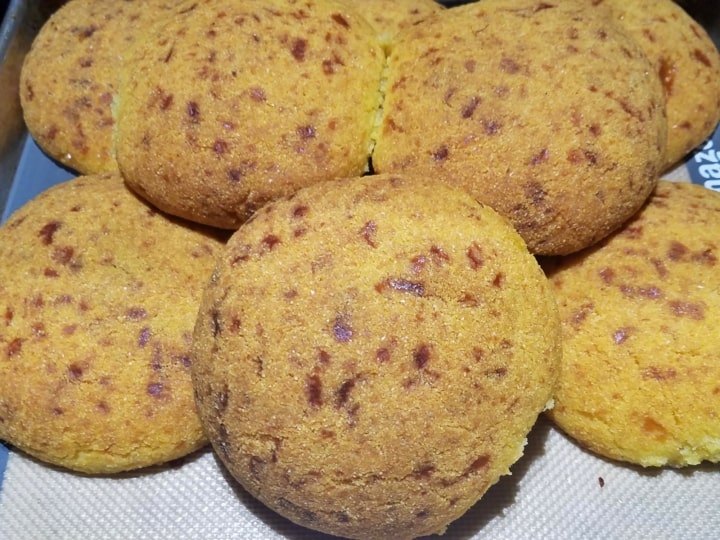
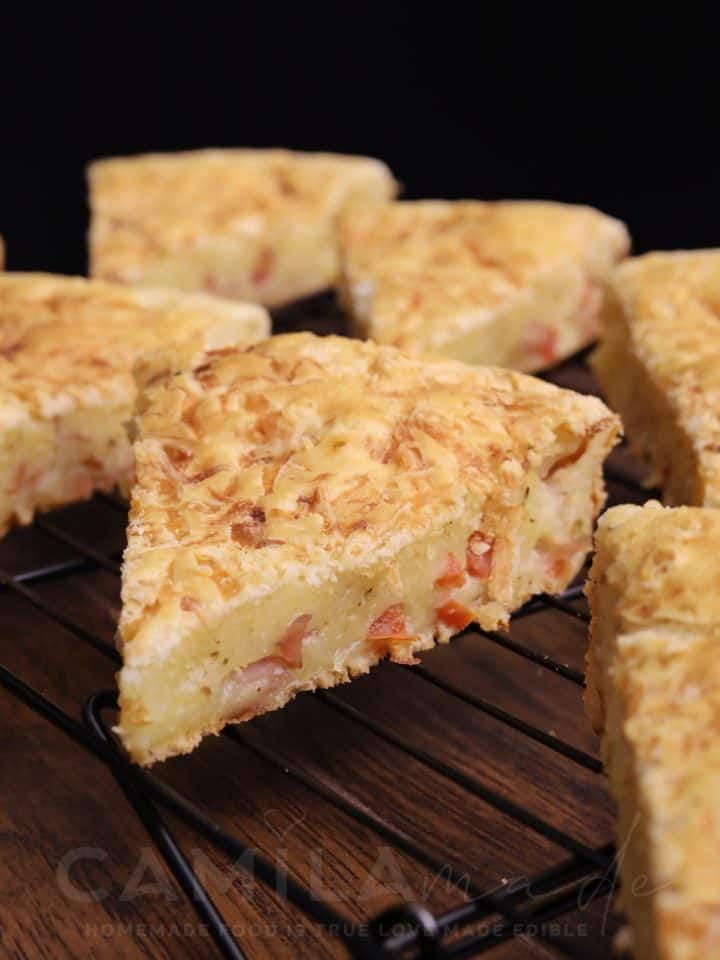
My family is the inspiration behind this Sopa Paraguaya recipe. Though I didn't inherit any family recipes, I wanted to create Paraguayan-inspired dishes to pass on to my children and future generations. After many trials, I've perfected this Sopa Paraguaya recipe, which has become my family's absolute favorite! Now, I'm excited to share it with you too. Trust me; it bursts with amazing flavors. And the best part? It's super easy to make!
servings: 12
prepping time: 15 min
cooking time: 50 min
Ingredients
- 3 Medium yellow onions, chopped
- 113 gr (about ½ cup) Butter melted and cooled
- 500 gr. Queso Panela or Queso Blanco, Crumbled
- 2 cups Buttermilk or whole milk, room temperature
- 5 Large eggs, room temperature
- 1-½ Teaspoons kosher salt
- 1 Tablespoon baking powder (optional, but I highly recommend using it as it is the secret ingredient that ensures a tender and light texture in the Sopa Paraguaya
- 400 g Quaker yellow cornmeal
- 1 Tablespoon Anise seeds, optional but highly recommended as it enhance the overall flavor
How to Make Sopa Paraguaya
- Preheat the oven to 350°F (175°C) and position the oven rack in the middle.
- Grease a 13'' x 9'' baking dish with butter, ensuring all sides and corners are well coated. Sprinkle cornmeal evenly over the greased baking dish, covering the bottom and sides. Gently shake off any excess cornmeal from the dish. Set the prepared baking dish aside.
- In a large skillet over medium-high heat, melt the butter. Add the chopped onions and salt to the skillet and cook them until they become soft and transparent; do not let them brown for about 5 to 10 minutes. Remove the skillet from heat, and stir in half of the buttermilk. Set aside to cool to room temperature.
- In a large mixing bowl, beat the eggs until frothy. Add the cooled onion mixture, cornmeal, anise seeds (rubbed to release flavor), and the remaining buttermilk. Whisk everything together until thoroughly combined, then gently stir in the cheese.
📌(Resist the urge to add extra cornmeal. The batter will have a runny consistency, but this is intentional to keep the Sopa Paraguaya light and prevent it from becoming too dense). - Transfer the cornmeal mixture to the prepared baking dish and tap it gently to even it out. Bake it in the oven until it turns golden brown, and the center is set, about 50 to 60 minutes, or until a cake tester or toothpick inserted in the center comes out clean.
- Allow the Sopa Paraguaya to cool in the pan for 10 to 15 minutes, then cut it into squares and serve it warm.
- Sopa Paraguaya is best enjoyed fresh from the oven, but it can be stored in an airtight container in the refrigerator for up to 5 days or in the freezer for up to 1 month. Thaw overnight in the refrigerator before serving.
- To reheat, wrap them in aluminum foil and warm in a 350°F oven until hot. Alternatively, heat the sopa paraguaya in the microwave in individual portions until just hot; do not overheat, or it will get tough.
Note: This Sopa Paraguaya recipe is easy to make with common supermarket ingredients. Quaker yellow cornmeal is recommended, but any medium-grind cornmeal works. Panela cheese is a good substitute for Queso Paraguayo. Other cheeses like Queso de Freir, Queso Blanco, Mexican Blend, Monterey Jack, Colby Jack, or cheddar can be used too.
The Best Chipa Guazu
There are various ways to prepare Chipa Guazu, but this recipe has become our family's absolute favorite over the years. Originally, I followed the traditional method of making Chipa Guazu using only fresh kernel corn, which turned out undeniably delicious. However, I decided to experiment and make a few tweaks to give it a heartier and more consistent texture, and the results were outstanding.
I incorporated cornmeal (I highly recommend the Quaker Brand), sautéed onions, and extra cheese into the batter, and the transformation was remarkable! The cornmeal introduced a delightful texture, while the extra cheese and sautéed onions elevated the overall flavor profile to a whole new level of deliciousness.
servings: 12
prepping time: 15 min
cooking time: 50 min
Ingredients
2 Large yellow onions, chopped
150 g Butter or ½ cup of Sunflower oil or Any neutral-flavored oil
500 g Queso Panela or queso Blanco, Crumbled
250ml (1 Cup) Whole Milk
6 Large Eggs, well beaten
1 Teaspoon Kosher Salt (to taste)
1 Cup (160g) Yellow Quaker Cornmeal
36 oz Fresh corn kernel, preferably sweet corn
How to Make Chipa Guazú
- Preheat your oven to 350°F (175°C) and position the oven rack in the middle. Grease a 13” x 9” baking dish with butter, ensuring all sides and corners are well coated. Sprinkle cornmeal evenly over the greased baking dish, covering the bottom and sides. Gently shake off any excess cornmeal. Set the prepared baking dish aside.
- In a large skillet over medium-high heat, melt the butter. Add the chopped onions and salt to the skillet and cook them until they become soft and transparent about 5 to 10 minutes. Do not let them brown. Remove the skillet from heat and stir in half of the milk. Allow this mixture to cool to room temperature.
- In a blender or food processor, combine the eggs and the remaining milk. Blend for 3 minutes until well combined.
- Add the fresh corn to the blender and pulse for about 10 to 15 seconds, just enough to break up the corn kernels. Be careful not to over-blend; you want to maintain some texture in the corn.
- Transfer the blended corn mixture to a large bowl and add the cornmeal and the cooled onion mixture. Stir until well combined. Stir in the shredded cheese, ensuring it's evenly distributed throughout the batter.
- Pour the corn batter into the prepared baking dish, spreading it out evenly.
- Bake in the preheated oven for about 50 to 60 minutes or until the top turns golden brown and a cake tester or toothpick comes out clean from the center.
- Once baked, set the Chipa Guazú aside to cool slightly before serving.
- Chipa Guazú is best enjoyed fresh from the oven, but it can be stored in an airtight container in the refrigerator for up to 5 days or in the freezer for up to 1 month. Thaw overnight in the refrigerator before serving.
- To reheat, wrap them in aluminum foil and warm in a 350°F oven until hot. Alternatively, heat the Chipa Guazú in the microwave in individual portions until just hot; do not overheat, or it will get tough.
Note: This Chipa Guazu recipe is simple to prepare using readily available supermarket ingredients. While Quaker yellow cornmeal is recommended, any medium-grind cornmeal will work. If you can't find Queso Paraguayo, you can substitute it with other mild cheeses like queso panela, Queso de Freir, Queso Blanco, Mexican Blend, Monterey Jack, Colby Jack, or cheddar. Fresh corn kernels are preferred, but you can use frozen or canned corn based on availability. Just make sure to thaw and drain it thoroughly before incorporating it into the recipe.
PART 1
- Sopa So'o
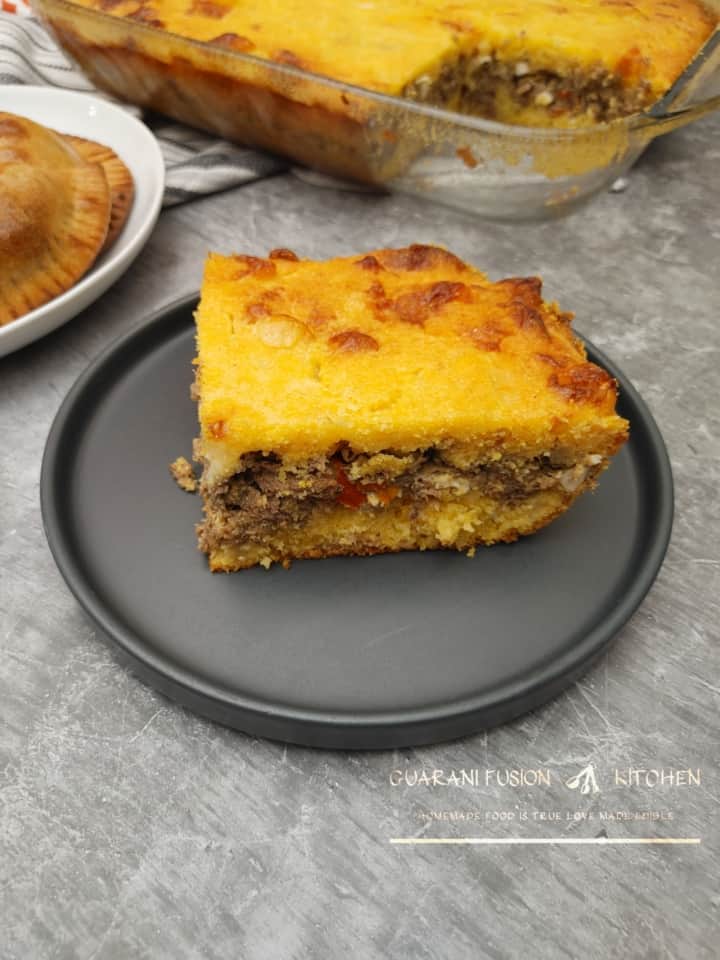
So much of Paraguayan food is comfort food, and one excellent example is Sopa So'o. This delicious dish consists of Traditional Sopa Paraguaya filled with seasoned ground beef, onions, garlic, and peppers.
For this Sopa So'o recipe, you can use my Chipa Guazu (Cheesy soufflé ) or Sopa Paraguaya (savory cornbread ) batter; both options are equally delicious.a
Sopa So’o is a versatile dish that's perfect for any day of the week. It's often served as a main course but can also be enjoyed as an appetizer or side dish. You can personalize it to your taste by adding ingredients such as olives, raisins, or hard-boiled eggs. 😋
Prep Time:
Cook Time: 50 min
For the Beef Filling: 50 min
Total Time: 2 hrs
Ingredients
For the Beef filling:
1 lb lean Ground Beef 90/10
1 large Onion, finely diced
1 tablespoon knorr beef flavor bouillon, to taste
5 cloves Garlic, finely minced
1 Red bell pepper, finely chopped
5 Large eggs (hard-boiled), chopped
Kosher salt to taste.
1 tablespoon paprika
½ teaspoon ground black pepper, to taste
½ teaspoon red pepper flakes
3 Tablespoons extra virgin olive oil
⅓ cup finely chopped Italian fresh parsley, cilantro, or green onion
Chipa Guazú (page )
How to Make Sopa So'o
Preparing the Filling:
- Heat 4 tablespoons of olive oil in a large skillet.
- Add the ground beef and season with beef bouillon, black pepper, paprika, and red pepper flakes. Cook it, stirring and breaking the pieces into the same size with a wooden spoon, until brown and cooked through about 8 to 10 minutes.
- Put in the onions, garlic, and pepper. Cook them until softened, about 8 to 10 minutes.
- Stir in the parsley and cook for another 5 minutes.
- Taste it and add more seasoning if you like. Let the filling cool down while you prepare the Sopa Paraguaya batter. Alternatively, transfer it to a large mixing bowl, cover it with plastic wrap, and refrigerate it for up to 3 days.
Preparing the Sopa Paraguaya Batter:
- Make the Batter: Prepare the batter for the Sopa Paraguaya batter. For this Sopa So'o recipe, you can use my Sopa Paraguaya or Chipa Guazu batter; both options are equally delicious.
To Store and Reheat: Store it in the refrigerator for up to 5 days in an airtight container or sealable plastic bag. To reheat, wrap the Sopa So'o in aluminum foil and warm it in a 350°F oven until hot. Alternatively, heat individual portions in the microwave for 30 to 45 seconds, ensuring not to overheat.
For Make-ahead and Freezing: After cooling completely, tightly wrap the Sopa So'o in plastic or aluminum foil. Refrigerate for up to 5 days or freeze in a freezer-safe, airtight container for up to 1 month. To thaw, place it in the refrigerator overnight. When ready to serve, follow the reheating instructions mentioned above.

- Chipa Guazu Muffins
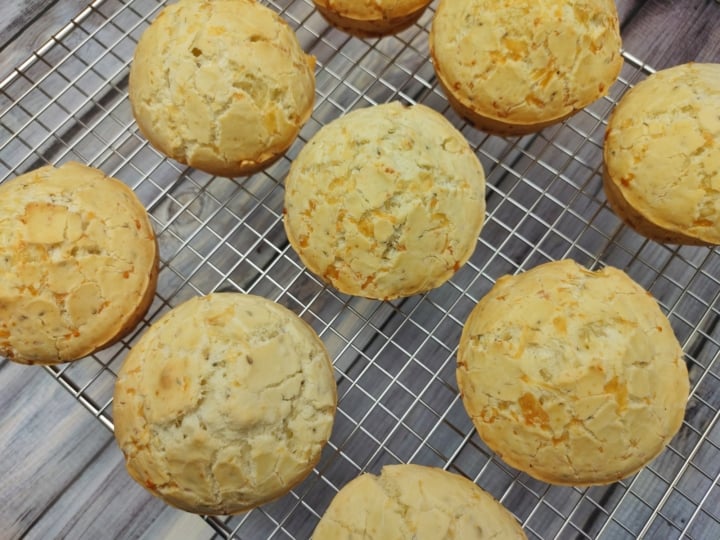
This sweet yet savory Paraguayan corn souffle muffins recipe is the perfect addition to any meal. This recipe takes just minutes to prepare from start to finish, yet it yields a sophisticated taste that will have your family raving for more!
Prep: 15 min
Cook Time: 45 min
Total Time: 1 hr
Ingredients
2 large onions , chopped
124 g sunflower oil or any neutral flavored oil
130 g Ricotta cheese, preferably full fat
200 g Shredded Mozzarella cheese, crumbled Queso para Freir, or shredded Mexican blend cheese
250 ml whole milk but low-fat works too , room temperature
4 whole eggs or egg white , room temperature
1-½ teaspoons kosher salt
1 spoonful grated Parmesan cheese optional
1 kg fresh corn or thawed frozen corn
How to Make Chipa Guazu Muffins
- Preheat oven to 350 degrees F.
- Butter 2 nonstick muffin pans (12 cups each) and dust with cornmeal.
- In a 12-inch skillet over medium heat, melt butter.
- Add chopped onions and salt; cook until softened (8-10 minutes).
- Remove skillet from heat; add half of the milk and let cool.
- Place eggs and remaining milk in blender; blend for 3 minutes.
- Add corn to blender; pulse for 10-15 seconds to break kernels.
- Combine onion mixture and corn mixture in a large bowl; stir well.
- Stir in cheese.
- Distribute corn batter evenly among muffin cups.
- Transfer muffin pans to the preheated oven.
- Bake until muffins are golden brown and a toothpick inserted into the center comes out clean (35-45 minutes).
- Cool slightly before serving.
Store and Reheat: Store it in the refrigerator for up to 3 days in an airtight container or sealable plastic bag. To reheat, heat individual portions in the microwave for 30 to 45 seconds, being careful not to overheat.
Make-ahead and freeze: It is not advisable as it tastes best when fresh.
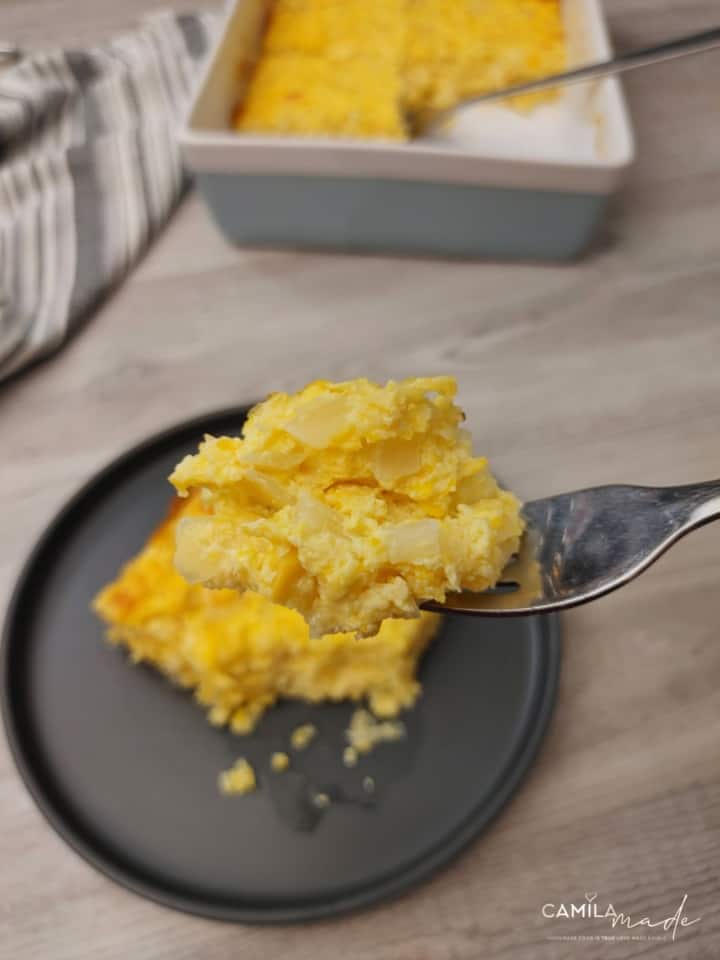
- Authentic Chipa Guazu
There are many versions of Chipa Guazu, and all of them are delicious, I’m sure. However, this particular recipe is my family’s favorite rendition, combining the more traditional ingredients with a unique twist since we live in the United States, where some ingredients are not readily available.
For this Chipa Guazu recipe, I’ve made a few substitutions: I replaced the traditional lard with butter, which gives this Chipa Guazu a rich and flavorful taste, and queso Paraguay with queso panela. The result is a delightful blend of flavors and textures.
However, my recipe is always evolving and changing as I continually experiment with different ingredients and techniques. Recently, I came up with a new variation that surpassed all expectations and has become my family’s absolute favorite! We proudly call it The Best Chipa Guazu on our website. I encourage you to try making this recipe, as well as my latest version– I’m confident you’ll enjoy it just as much as we do!
Ingredients
1 large yellow onion onions , chopped
60 ml (¼ cup) butter (melted and cooled off), lard, or any neutral oil, plus greasing the pan
250 g Queso Panela, or Queso Blanco , crumble into small pieces
2 cups whole milk , room temperature
3 large eggs , well beaten
1-½ teaspoons kosher salt adjust to taste
500 g fresh corn thawed frozen corn, or canned whole kernel corn, well-drained
How to Make Authentic Chipa Guazu
- Preheat the oven to 350°F (175°C) and position the rack in the middle.
- Grease a 13" x 9" baking dish with butter, ensuring all sides and corners are well coated.
- Sprinkle cornmeal evenly over the greased baking dish, covering the bottom and sides.
- Gently shake off any excess cornmeal from the dish and set the prepared baking dish aside.
- In a blender or food processor, add the eggs and milk and blend for 3 minutes until well combined.
- Add the fresh corn to the blender and pulse for about 10 to 15 seconds, just enough to break up the corn kernels. Be careful not to over-blend; you want to maintain some texture in the corn.
- Transfer the blended corn mixture to a large bowl.
- Add the cornmeal, chopped onion, and cooled melted butter to the bowl and stir until well combined.
- Stir in the cheese, ensuring it's evenly distributed throughout the batter.
- Pour the corn batter into the prepared baking dish, spreading it out evenly.
- Bake in the preheated oven for about 50 to 60 minutes or until the top turns golden brown and a cake tester or toothpick comes out clean from the center.
- Once baked, set the Chipa Guazú aside to cool slightly before serving.
Store and Reheat: Store it in the refrigerator for up to 5 days in an airtight container or sealable plastic bag. To reheat, heat individual portions in the microwave for 30 to 45 seconds, ensuring not to overheat.
Make-ahead and freeze: It is not advisable as it tastes best when fresh.
- Chipa Mestizo
Chipa Mestizo is a traditional and typical Paraguayan food. It is the second most common variety of chipa in Paraguay and is named for its combination of corn flour and yuca starch.
This easy-to-make chewy cheese-flavored cornbread requires just a few ingredients and can be baked in any home oven. And the best part? It's naturally gluten-free.
Ingredients
1 kg. Tapioca Starch
300 gr Quaker yellow cornmeal
300 gr. Butter or lard, room temperature.
8 eggs , room temperature
3 teaspoons kosher salt (to taste)
220 ml (1 cup) buttermilk or whole milk, room temperature
800 gr. Frying Cheese (Queso para Freir) or Parmesan cheese, cut into small cubes.
15 gr. Anise seeds (to taste)
1 tablespoon Baking powder * (Final Secret ingredient for making a little lighter and more airy Chipa)
How to Make Chipa Mestizo
-
Preheat your oven to 500°F (260°C) and line two 13x18x1 baking sheets with parchment paper.
-
In a large mixing bowl, combine tapioca starch, cornmeal, salt, anise, and baking powder.
-
On a clean work surface, pour out the yuca starch mixture and form a well in the center. Add softened butter and eggs, mixing them into the starch with your fingers until creamy.
-
Gradually incorporate the dry ingredients into the wet mixture by hand until a coarse crumb forms. (The coarse crumb should appear loose but hold together when pressed.)
-
Mix in cheese until well integrated.
-
Slowly add buttermilk, just enough to make the dough easy to knead but not too firm. Knead by hand until the dough is compact and moist. Note: you may not need to use all the buttermilk; if it becomes too soft, add a little more tapioca flour.
-
Knead the dough using the heel of your hand to push it away from you, then gather it back using a bench scraper. Continue until the dough is smooth, compact, and no longer sticks to the surface or your hands, about 4-5 minutes. Note: The dough should have a smooth playdough-like consistency when done.
-
Cover the dough with a clean kitchen towel and let it rest for 15-20 minutes.
-
To shape the chipas, pinch off a piece of dough and roll it into a ball, about 130g each. Roll into an 8-inch log, join the ends to form a circle, and press to seal. For diagonal shapes, roll into a 9-inch long, 2-inch diameter log and cut into 3-inch diagonal slices.
-
Place shaped dough on the prepared baking sheets and bake until lightly golden and puffed, about 12-15 minutes. Do not overcook. Serve immediately.
I developed this Chipa Mestizo recipe using Quaker yellow cornmeal because it was readily available in the U.S. While traditional Chipa is made with Harina de Maiz Paraguaya, I adapted the recipe to use more easily accessible ingredients.
How to Store & Re-Heat
Chipa tastes best when served fresh out of the oven, but it can be stored in an airtight container or sealable plastic bag at room temperature for up to 3 days or refrigerated for up to 5 days.
Warm the cheese bread in the microwave for a few seconds or until just heated through; do not overheat, or it will get tough. Alternatively, you can wrap the bread in aluminum foil and warm it in a 350°F oven until hot.
Make-Ahead & Freeze
You can prepare the Chipa Mestizo dough the day before and store it covered in the fridge until needed. Alternatively, shape the Chipa dough as instructed and place it on a parchment-lined baking sheet. Instead of baking immediately, refrigerate for up to 24 hours. When ready to bake, follow the recipe's baking instructions.
To freeze Chipa, shape the dough into the desired shape and place it on a parchment-lined baking sheet in the freezer until firm. Once frozen, transfer them to a freezer-safe container or bag, removing excess air. Label and freeze for up to 2 months. When you want to bake, preheat the oven and bake the frozen Chipa, adjusting the baking time slightly as needed.
- Chipa Almidon
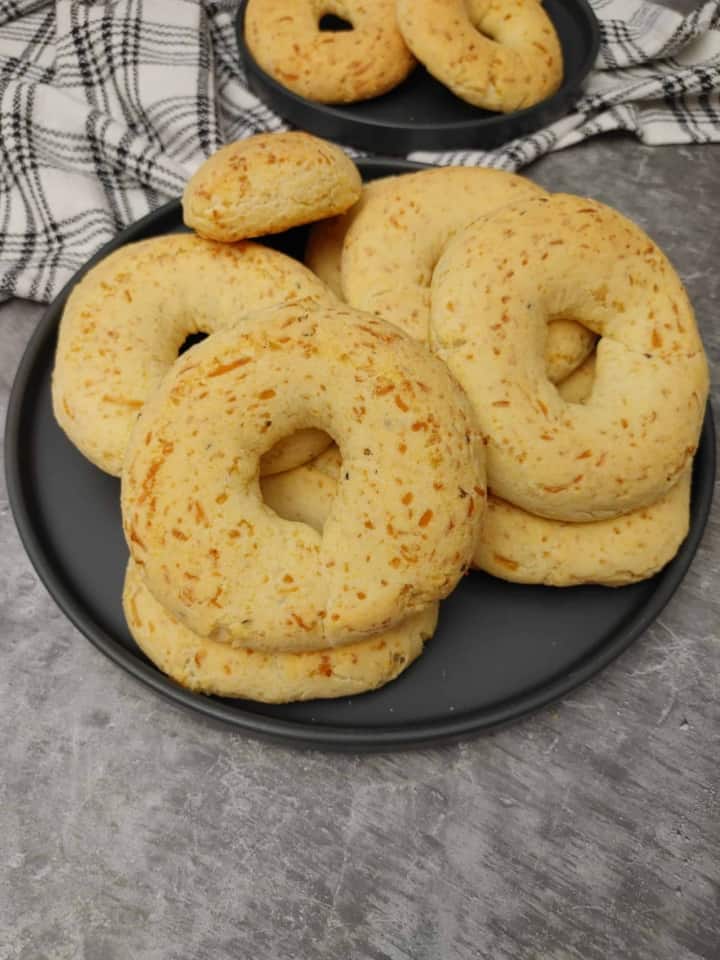
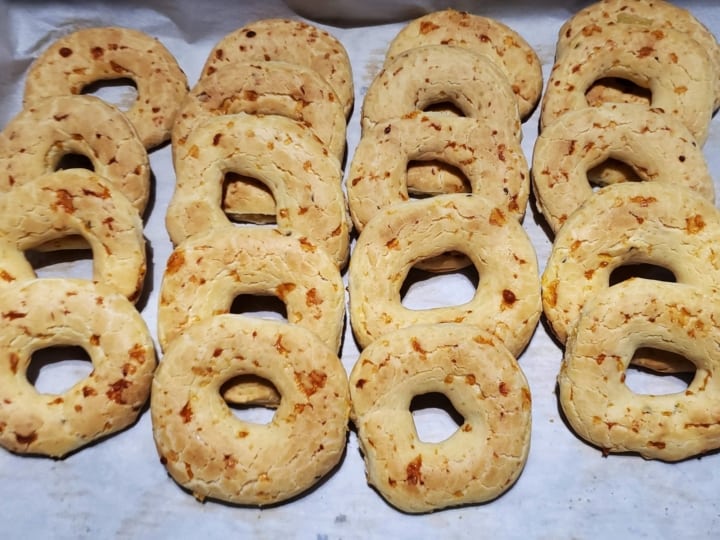
Chipa almidón is a traditional Paraguayan cheese bread, similar to Brazilian Pão de Queijo. It's the most popular type of chipa. It is known for its firmer dough and distinctive donut shape. It has a crunchy crust and a soft, slightly chewy interior with a subtle hint of anise flavor. (Bonus: it's gluten-free!)
While the typical Chipa recipe tends to be a bit dry and hardens quickly, I have a couple of tricks to enhance its flavor and texture. First, I use buttermilk instead of milk to add a subtle tang and maintain moisture.
Secondly, I add baking powder to ensure a lighter, airier texture. Lastly, while adding anise seeds is a matter of personal preference, it adds a distinctive flavor that sets it apart from its Brazilian cousin, so I highly recommend it. These adjustments are optional but help with the overall texture.
It is best when served warm directly from the oven, but it is equally delicious at room temperature. It also freezes well for later use. It's a popular choice for breakfast and pairs wonderfully with mate cocido or coffee.
Ingredients
- 1 kg. Yuca Starch
- 300 gr. butter , room temperature
- 6 large eggs , room temperature
- 3 teaspoons kosher salt (to taste)
- 8 oz (1 cup) buttermilk or whole milk , room temperature
- 700 gr. Shredded Mexican or Queso Panela Basket such as El Viajero or Queso de Freir "Fresh white Cheese for frying" such as Tropical Brand ,crumbled
- 20 g ( 2 Tablespoons) anise seeds , to taste
- 15 g (1 tablespoon) Baking powder
- 40 g ( 4 tablespoons) Dry whole milk such as Nido Brand , optional
HOW TO MAKE
- Preheat your oven to 500°F (260°C) and line two 13x18x1 baking sheets with parchment paper.
- In a large mixing bowl, combine tapioca starch, salt, anise, and baking powder.
- On a clean work surface, pour out the yuca starch mixture and form a well in the center. Add softened butter and eggs, and cream together with your fingers until creamy and smooth.
- Gradually incorporate the dry ingredients into the wet mixture by hand until a coarse crumb forms. The coarse crumb should appear loose but hold together when pressed.
- Mix in the cheese until well integrated.
- Slowly add buttermilk, just enough to make the dough easy to knead but not too firm. Knead by hand until the dough is compact and moist. Note: you may not need to use all the buttermilk; if it becomes too soft, add a little more tapioca flour.
- Knead the dough using the heel of your hand to push it away from you, then gather it back using a bench scraper. Continue until the dough is smooth, compact, and no longer sticks to the surface or your hands, about 4-5 minutes. The dough should have a smooth playdough-like consistency when done.
- Cover the dough with a clean kitchen towel and let it rest for 15-20 minutes.
- To shape the chipas, pinch off a piece of dough and roll it into a ball, about 130g each. Roll into an 8-inch log, join the ends to form a circle, and press to seal. For diagonal shapes, roll into a 9-inch long, 2-inch diameter log and cut into 3-inch diagonal slices.
- Place the shaped dough on the prepared baking sheets and bake until lightly golden and puffed, about 12-15 minutes. Do not overcook. Serve immediately.
How to Store & Re-Heat
Chipa tastes best when served fresh out of the oven, but it can be stored in an airtight container or sealable plastic bag at room temperature for up to 3 days or refrigerated for up to 5 days.
Warm the cheese bread in the microwave for a few seconds or until just heated through; do not overheat, or it will get tough. Alternatively, you can wrap the bread in aluminum foil and warm it in a 350°F oven until hot.
Make-Ahead & Freeze
You can prepare the Chipa Almidon dough the day before and store it covered in the fridge until needed. Alternatively, shape the Chipa dough as instructed and place it on a parchment-lined baking sheet. Instead of baking immediately, refrigerate for up to 24 hours. When ready to bake, follow the recipe's baking instructions.
To freeze Chipa, shape the dough into the desired shape and place it on a parchment-lined baking sheet in the freezer until firm. Once frozen, transfer them to a freezer-safe container or bag, removing excess air. Label and freeze for up to 2 months. When you want to bake, preheat the oven and bake the frozen Chipa, adjusting the baking time slightly as needed.
- Chipa Asador
Chipa Asador, also known as Chipa Kavuré or Chipa Caburé, is a traditional food in Paraguayan cuisine. It is a type of cheese bread made with yuca starch.
It has an elongated and hollow shape because it is cooked on a wooden stick, often a broomstick, which is placed directly over a fire pit; hence part of its name.
Chipa Kavuré is one of the many varieties of chipa found in Paraguay. This version is made primarily with yuca starch and fat. Its consistency is a bit denser, which allows it to adhere well to the stick during cooking.
Ingredients
1 kg Yuca Starch
300 g butter or lard , room temperature
large eggs , room temperature
20 g anise seeds
600 g Fresh White cheese for frying ''Queso de Freir'' , or queso panela, crumbled
3 teaspoons kosher salt
100 ml Whole Milk or buttermilk
100 g Shredded Parmesan , to Sprinkle on
How to Make
- In a large mixing bowl, combine yuca starch, salt, anise, and baking powder.
- On a clean work surface, pour out the yuca starch mixture and form a well in the center.
- Add softened butter and eggs to the well, and cream together with your fingers until it is creamy and smooth.
- Gradually incorporate the dry ingredients into the wet mixture by hand until a coarse crumb forms. The coarse crumb should appear loose but hold together when pressed.
- Mix in the cheese until well integrated.
- Slowly add buttermilk, just enough to make the dough easy to knead but not too firm. Note: you may not need to use all the buttermilk; if it becomes too soft, add a little more tapioca flour.
- Knead the dough using the heel of your hand to push it away from you, then gather it back using a bench scraper. Continue until the dough is smooth, compact, and no longer sticks to the surface or your hands, about 4-5 minutes. The dough should have a smooth playdough-like consistency when done.
- Cover the dough with a clean kitchen towel and let it rest for 15-20 minutes.
- Place the handful of dough on a wooden stick with a good point and a thickness of around 1 inch (2.5 cm).
- Wrap the "asador" stick with the dough, covering about 10 inches in length.
- Sprinkle the shredded Parmesan over the dough and press slightly to adhere.
- Cook over the embers, turning occasionally to prevent burning. The chipa asador will be ready when the dough is golden on all sides, about 15 minutes.
How to Store & Re-Heat
Chipa Cabure tastes best when served freshly made, but it can be stored in an airtight container or sealable plastic bag at room temperature for up to 3 days.
Warm the cheese bread in the microwave for a few seconds or until just heated through; do not overheat, or it will get tough. Alternatively, you can wrap the cheese bread in aluminum foil and warm it in a 350°F oven until hot.
Make-Ahead
You can prepare the Chipa dough the day before and store it covered in the fridge for up to 24 hours. When ready to cook, follow the recipe's cooking instructions.
CHIPA PIRÚ
Chipita, also known as Chipa Pirú, is one of the many variations of Paraguayan chipas. It is known for its crisp and crunchy texture and tiny size.
Inspired by my Chipa Mestizo, this recipe features all the beloved qualities of a classic chipita while adding a delicate corn flavor for an even more delicious flavor.
It is super easy to make, requiring only a few basic ingredients. Plus, it's naturally gluten-free, making it a perfect snack for everyone! Though shaping them might take a bit of time, the end result is incredibly rewarding.
It is best served once it has cooled down, as it improves its texture. Its versatility makes it an excellent choice for breakfast as a mid-day snack or alongside a cup of mate cocido. You can even serve them as an appetizer. Give it a try—you won't be disappointed!
Ingredients
116 g Yuca Starch also known as Tapioca Starch
110 g corn starch
44 g Quaker cornmeal
80 g Mexican Shredded Cheese
½ tablespoon baking powder
60 g butter softened to room temperature
7 tablespoons 2% milk or water as needed, room temperature
1 large egg , room temperature
1 teaspoon kosher salt
How to Make
-
Preheat your oven to 400°F (200°C)—line (2) 13x18x1 baking sheets with parchment paper.
-
In a large mixing bowl, combine the yuca starch, cornstarch, cornmeal, baking powder, cheese, and salt. Mix well and set aside.
-
Add the softened butter and eggs to the dry ingredients. Use your fingers to mix the eggs and butter until it resembles a coarse crumb.
-
Mix in the cheese until it's well integrated.
-
Add a bit of water to the mixture, adding just enough to prevent it from becoming too firm and to make it easy to knead. Continue mixing with your hands until it is compact and homogeneous. When done, the dough should have a smooth playdough-like consistency.
-
Pinch off small pieces of dough (about 10g each) and make small circles or doughnuts, about one inch in diameter, by rolling a small amount of dough into a log and then joining the ends to form a circle. Press gently to seal.
-
Place the shaped Chipa on the prepared baking sheet and bake in the preheated oven until they crisp, about 20 minutes. Keep an eye on them to avoid burning.
How to Store & Re-Heat
Chipa Piru tastes best when served fresh out of the oven, but it can be stored in an airtight container or sealable plastic bag at room temperature for up to 5 days.
Make-Ahead & Freeze
You can prepare the Chipa dough the day before and store it covered in the fridge until needed. Alternatively, shape the Chipa dough as instructed and place it on a parchment-lined baking sheet. Instead of baking immediately, refrigerate for up to 24 hours. When ready to bake, follow the recipe's baking instructions.
To freeze Chipa, shape the dough into the desired shape and place it on a parchment-lined baking sheet in the freezer until firm. Once frozen, transfer them to a freezer-safe container or bag, removing excess air. Label and freeze for up to 2 months. When you want to bake, preheat the oven and bake the frozen Chipa, adjusting the baking time slightly as needed.
- Chipa So'o
For the Dough:
500 grs , Harina Paraguaya Corn Flour, or Quaker yellow cornmeal (medium grind) * I usually mix 250 grs. Cornmeal with 250 grs. white Harina P.A.N
200 grs , salted Butter, lard (pork fat), or shortening, cut into cubes
2 tbsps , Yuca starch or cornstarch
200 grs queso blanco (queso para freir)
3 teaspoon Kosher Salt , to taste
1 egg , room temperature
½ cup Whole Milk , room temperature
For the filling:
1 kg boneless Beef Chuck , trimmed and cubed
3 medium yellow onion , finely diced
1 Poblano Pepper or green bell peppers , finely chopped
1 red bell pepper , finely chopped
1 yellow or orange , finely chopped
4 Scallions or green onion , white and green parts separated
5 Garlic cloves , finely minced
2 tablespoons extra virgin olive oil
¼ teaspoon ground black pepper , adjust to taste
1 teaspoon red pepper flakes , adjust to taste
1 tablespoon sweet paprika
1 tablespoon plus 2 teaspoons knorr beef flavor bouillon
1 tablespoon ground cumin , to taste (optional)
Kosher salt , to taste
1 bunch fresh Italian parsley or cilantro , finely chopped ( stem removed)
4 hard-boiled eggs , minced
How to Make
Prepare the Eggs
-
Place the eggs in a saucepan in a single layer, and fill the pan with enough cold water to cover the eggs by about an inch.
-
Bring to a rolling boil over high heat. Once the water is boiling, begin timing and counting down to 10 minutes.
-
Meanwhile, prepare a bowl of ice water. Carefully pour out the hot water and transfer the cooked eggs to the ice water to cool completely for about 10 minutes.
-
Gently crack an egg all over by tapping it against the counter. Starting at the large end, hold the egg either in the bowl of ice water or under a thin stream of cold water, and start peeling. Return the peeled egg to the ice water to continue chilling.
-
Pat the eggs dry with a paper towel and place them in a bowl. Using a fork, mince the eggs, cover it with plastic wrap, and store it in the refrigerator until ready to use.
Prepare the Beef Filling
-
In a large nonstick pot, combine beef, 2 tablespoons olive oil, water, beef bouillon, ground black pepper, red pepper flakes, and garlic. Stir and bring to a simmer over medium-high heat.
-
Reduce heat to low, cover, and simmer, occasionally stirring, until the beef is tender, about 1 hour. Remove the lid and increase heat to high until the liquid reduces to a juicy but dry consistency, about 3 to 5 minutes.
-
Add the paprika, white part of the scallions, onions, and peppers. Cook until soft, about 10 minutes.
-
Add the parsley and the green part of the green onions. Sauté for another 10 minutes to eliminate any excess liquid (the mixture should be moist but not runny). Taste and adjust seasoning if needed.
-
Working in batches, transfer the meat mixture to a food processor or blender and pulse until it is coarsely shredded (do not overdo it, or you'll end up with a puree).
-
Transfer each batch of shredded meat mixture into a large mixing bowl and mix in the minced eggs. Let it cool to room temperature, then cover and refrigerate until ready to use.
Prepare the Dough
-
Whisk the cornmeal, yuca starch, and 3 teaspoons of kosher salt in a large bowl.
-
Make a well in the center of the cornmeal mixture and add the butter, milk, cheese, and egg.
-
Work the wet mixture into the cornmeal mixture to form a soft and smooth dough. If more liquid is needed, add a little more milk. Cover and refrigerate until ready to use.
Assemble the Chipa So'o
-
Preheat the oven to 350°F.
-
Grab a handful of dough and roll it into a large ball. Flatten it with your hand, creating a hollow in the center with one of your thumbs to create a basket-like shape.
-
Place a heaping spoonful of the filling in the center of the dough, then slowly close it to form a ball with the filling inside. Flatten the base on one side and give it a rounded or domed shape.
-
Place the finished piece on a non-stick oven sheet or lightly greased and lightly dusted with cornmeal. Repeat the process until all the pieces are finished. If necessary, cook the Chipa So'o in two batches.
-
Bake the Chipa So'o for 20 to 25 minutes or until golden brown.
How to Store & Reheat
Chipa So'o tastes best when served fresh out of the oven, but it can be stored in the refrigerator in an airtight container or sealable plastic bag for up to 5 days.
To reheat, wrap the Chipa So'o in aluminum foil and warm in a 350°F oven until hot. Alternatively, heat squares in the microwave for 30 to 45 seconds or until just heated through; do not overheat, or they will get tough.
Make-Ahead
The filling for the Chipa So'o can be made one day in advance and refrigerated until ready to use.
The dough can also be made and stored in the refrigerator until ready to assemble and bake.
How to Freeze
To freeze Chipa So'o, let it cool completely after baking, then wrap each piece tightly with plastic wrap and place them in a sealable freezer bag. Alternatively, you can store the Chipa So'o in an airtight container with layers of parchment or wax paper in between to prevent sticking.
The frozen Chipa So'o will last for up to three months. To reheat, preheat the oven to 350°F and remove the plastic wrap or wax paper from the Chipa So'o.
Wrap them in aluminum foil and bake in the oven until heated, about 15-20 minutes. You can also microwave them for 30 to 45 seconds, but the texture may not be as crisp.
- Chipa Bun
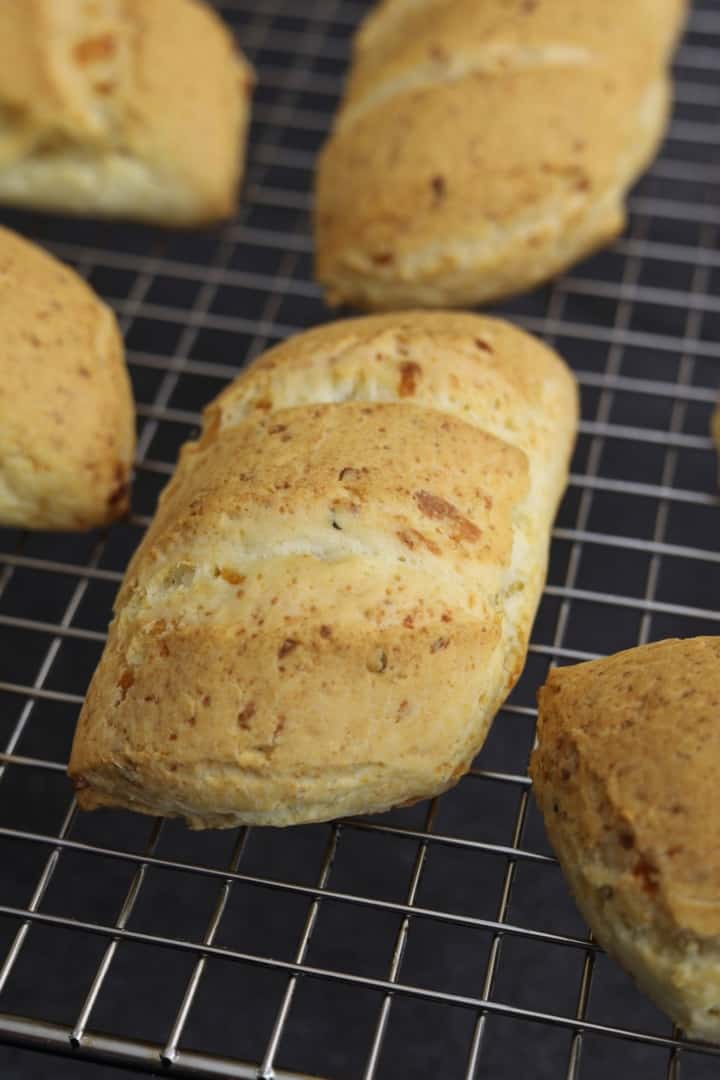
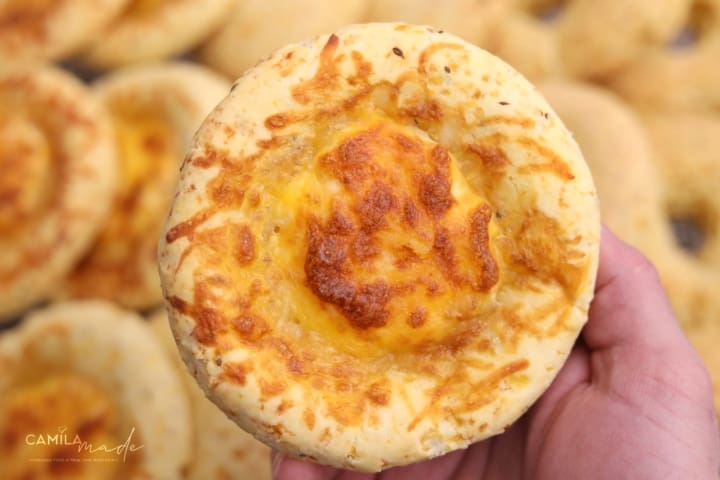
If you’re a fan of cheesy bread, you must try the Paraguayan Inspired Chipa Buns or cheese buns, a perfect twist on the classic Paraguayan Chipa. Made with a blend of tangy cheeses and a subtle hint of anise seeds, these buns offer an utterly unique and irresistible flavor combination you won’t find anywhere else.
INGREDIENTS
- 250 g Tapioca starch
- 250 g self-raising flour
- 2 large eggs , room temperature
- 80 g butter softened to room temperature
- 300 g Mexican 4 cheese , shredded
- 1 tablespoon baking powder
- 1 tablespoon anise seeds
- ¾ cup buttermilk or whole milk, room temperature
How to Make Chipa Bun
- Preheat the oven to 375°F (190°C).
- In a large mixing bowl, combine the yuca starch or tapioca starch, salt, self-rising flour, and baking powder.
- Rub the anise seeds between your palms to release the flavor, then add them to the mixing bowl and stir to combine.
- Place the yuca starch mixture on a clean work surface and make a hole in the center. Add the softened butter and eggs to the hole. Use your fingers to mix the wet ingredients together until somewhat incorporated. Begin to incorporate the yuca starch mixture into the wet mixture a little at a time until a crumbly dough forms.
- Add the shredded cheese and mix with your hands until everything is well combined.
- Drizzle the buttermilk or whole milk a bit at a time, mixing with your hands until a compact and moist but not wet dough has formed.
- Use the heel of your hand to smear the dough away from you. Gather it back together with a bench scraper and continue kneading until it becomes smooth and compact, easily detaching from the working surface and your hands. This should take about 4 to 5 minutes. The dough should have the consistency of smooth play dough.
- Cover the dough with a clean kitchen towel and let it rest for at least 15 to 20 minutes. This resting time will allow the dough to relax and improve the texture of your final product.
- Divide the dough into 12 equal portions (about 125g each). Shape each portion into a ball. Place the balls on a greased baking sheet, then gently press down on each ball with three fingers to flatten slightly.
- Bake the chipa buns in the preheated oven for 30 to 35 minutes or until they are puffed and golden brown.
- Allow the chipa buns to cool for a few minutes before serving.
How to Store & Reheat
Chipa Bun tastes best when served fresh out of the oven, but it can be stored in the refrigerator in an airtight container or sealable plastic bag for up to 5 days.
-
Chipa 4 Quesos
Chipa 4 Quesos is a delicious variation of the traditional Paraguayan Chipa Almidon made with simple ingredients such as yuca starch, eggs, cheese, and butter. While the recipe may seem straightforward, achieving the perfect result requires attention to detail. With its unique texture, savory flavor, and golden crust, chipa is a beloved snack food and staple in Paraguayan cuisine that has become increasingly popular in other parts of South America and beyond.
INGREDIENTS
For the Chipa 4 Quesos:
- 1 kg Yuca Starch
- 300 gr butter , softened
- 6 large eggs , room temperature
- 3 teaspoons kosher salt (to taste)
- 250 ml buttermilk or whole milk
- 700 gr Mexican 4 cheese , shredded
- 20 gr ( 2 tablespoons) anise seeds, to taste
- 1-½ tablespoons Non-Aluminum Baking powder: Chipa Almidon recipe does not require baking powder; however , I use it in my Chipa Almidon recipe because it produces a better result by making it lighter and less dense.
For the Cream Cheese & Mexican 4 Cheese Mixture:
- 1 (8 oz) Full Fat Cream Cheese , Softened
- 100 g Mexican 4 Cheese Blend , shredded
How to Make Chipa 4 Quesos
- Preheat your oven to 500°F (260°C) and line two 13x18x1 baking sheets with parchment paper.
- In a large mixing bowl, combine 4 cups of tapioca starch, 1 teaspoon of salt, 1 teaspoon of anise seeds, and 1 teaspoon of baking powder.
- On a clean work surface, pour out the tapioca starch mixture and form a well in the center. Add ½ cup of softened butter and 2 large eggs, mixing them into the starch with your fingers until creamy.
- Gradually incorporate the dry ingredients into the wet mixture by hand until a coarse crumb forms. The coarse crumb should appear loose but hold together when pressed.
- Mix in 2 cups of shredded cheese (e.g., Parmesan, Mozzarella) until well integrated.
- Slowly add about ½ cup of buttermilk, just enough to make the dough easy to knead but not too firm. Note: you may not need to use all the buttermilk; if it becomes too soft, add a little more tapioca flour. Knead by hand until the dough is compact and moist.
- Using the heel of your hand, push the dough away from you, then gather it back using a bench scraper. Continue kneading until the dough is smooth, compact, and no longer sticks to the surface or your hands, about 4-5 minutes. The dough should have a smooth, playdough-like consistency when done.
- Cover the dough with a clean kitchen towel and let it rest for 15-20 minutes.
- To shape the chipas, grab a handful of dough (about 125g) and make a well in the center. Add a small amount of cream cheese into the well, then close and flatten it out to about 4 inches in diameter and 1 inch thick. Alternatively, you can grab a handful of dough (about 125g) and squeeze it into a ball; flatten the dough a bit, leaving the edges thick. Make a well in the center, add the cream cheese mixture, and sprinkle with Mexican cheese on top.
- Arrange the shaped dough on the prepared baking sheets, spacing them 1 inch apart.
- Bake for 15 to 17 minutes, or until golden brown and cheese spots appear on the surface.
- Remove from the oven and let the chipas cool for a few minutes before serving.
How to Store & Reheat
Chipa 4 Quesos tastes best when served fresh out of the oven, but it can be stored in an airtight container or sealable plastic bag at room temperature for up to 3 days or refrigerated for up to 5 days.
Warm the cheese bread in the microwave for a few seconds or until just heated through; do not overheat, or it will get tough. Alternatively, you can wrap the bread in aluminum foil and warm it in a 350°F oven until hot.
Make-Ahead & Freeze
You can prepare the Chipa dough the day before and store it covered in the fridge until needed. Alternatively, shape the Chipa dough as instructed and place it on a parchment-lined baking sheet. Instead of baking immediately, refrigerate for up to 24 hours. When ready to bake, follow the recipe's baking instructions.
To freeze Chipa, shape the dough into the desired shape and place it on a parchment-lined baking sheet in the freezer until firm. Once frozen, transfer them to a freezer-safe container or bag, removing excess air. Label and freeze for up to 2 months. When you want to bake, preheat the oven and bake the frozen Chipa, adjusting the baking time slightly as needed.
- Chipa Muffins
In just 10 minutes, you can prepare the dough for these Chipa Muffins. After that, the oven does the rest of the work. This method results in light, airy cheese bread with a deliciously golden crust. If you don't have parmesan cheese, feel free to use a mix of any cheeses you have in your fridge.
INGREDIENTS
- 250 g yucca starch
- ½ cup avocado oil , extra virgin olive oil, olive oil, canola oil, or vegetal
- 1 cup whole milk , room temperature
- 100 g (1 cup) Parmesan cheese, shredded plus for garnish
- 1 large egg , room temperature
- 1 teaspoon kosher salt
How to Make Chipa Muffins
- Preheat the oven to 400°F (200°C).
- Greased a 12-cup nonstick muffin pan with cooking spray and set aside.
- Set aside 2 tablespoons of parmesan cheese to sprinkle on top.
- In a small bowl, crack the egg and transfer it to a blender.
- Add the remaining ingredients to the blender and blend for about 1 minute until the mixture is smooth.
- Fill the cupcake molds with the batter, filling each about ¾ full.
- Sprinkle the reserved grated cheese on top of the batter.
- Bake for approximately 20 to 25 minutes or until the muffins are puffed and golden.
- Remove the molds from the oven and carefully unmold the cheese muffins while they are still hot.
- Serve immediately.
Store and Reheat:
Store it in the refrigerator for up to 3 days in an airtight container or sealable plastic bag. To reheat, heat individual portions in the microwave for 30 to 45 seconds, being careful not to overheat.
Make-ahead and freeze:
It is not advisable as it tastes best when fresh.
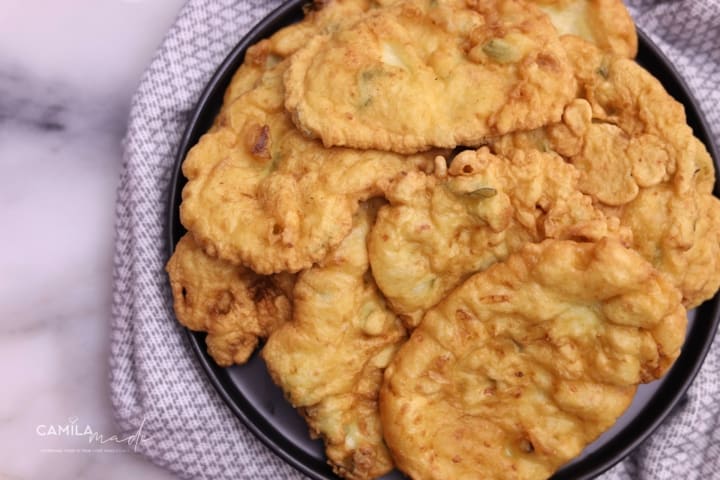
- Tortilla Paraguaya
Tortilla Paraguaya is a traditional Paraguayan dish known for its versatility. It is perfect for any occasion, whether served for breakfast, lunch or as an accompaniment to other Paraguayan meals. It is a staple that is always ready to satisfy unexpected hunger.
If you're a fan of Paraguayan food, a good tortilla recipe is a must. The Paraguayan tortilla, despite sharing its name with the Mexican tortilla, is actually a completely different dish. While the Mexican tortilla is somewhat like a chapati made from flour or nixtamalized corn, the Paraguayan version is a type of fritter with cheese, to which more consistency is added by incorporating cornmeal.
The process of making this tortilla is quite simple and practical. You can make the traditional version with cornmeal and cheese or create variations by including other ingredients. For example, you can add leftover rice, chopped green onion, or small diced onion along with the cheese, enhancing the final flavor of the tortilla.
You can also add parsley or cilantro to give it a bit of color and flavor, and some other variants include grated carrots. The dough for this dish is very versatile and can accommodate various ingredients to suit your taste. However, on this occasion, I will be sharing the most traditional recipe.
INGREDIENTS
- 4 large eggs , beaten
- 1 cup Panela cheese or Queso de Freir , crumbled or any mild shredded cheese
- 375 g all-purpose flour , spooned & leveled
- 12 oz 2% milk or water
- ½ cup finely chopped fresh green onions , optional
- 2-½ teaspoons Kosher salt , adjust to taste
- 1 liter Sunflower oil for frying or vegetable oil
How to Make Tortilla Paraguaya
-
In a large bowl, whisk the eggs until foamy, then add salt, flour, water, and milk.
-
Whisk all the ingredients together until there are no lumps and the batter is smooth.
-
Stir in the cheese and chopped green onions.
-
Pour oil into a large frying pan to a depth of 2 inches and heat over medium-high heat until the temperature reaches 350 degrees F.
-
Test the oil by dropping a small amount of batter into the pan. If it sizzles, the oil is ready.
-
Using a small ladle, drop the mixture in 3-4 inch diameter batches into the hot oil, leaving a few inches between each.
-
As soon as the tortillas float, turn them with a fork and cook until both sides are crisp and light golden brown, about 2-3 minutes on each side.
-
Work in small batches to avoid overcrowding the pan and ensure a crisp exterior.
-
Using a slotted spoon, transfer the cooked tortillas to a paper towel-lined plate.
-
Serve hot.
How to Store & Reheat
Tortilla Paraguaya can be stored in an airtight container in the refrigerator for up to 3 days. To reheat, place them on a microwave-safe plate and heat on high for 15 to 20 seconds, checking frequently until heated through.
How to Make Ahead Freeze
It is not recommended to make ahead or freeze Tortilla Paraguaya as it is best enjoyed freshly made.
- Coquito Paraguayo
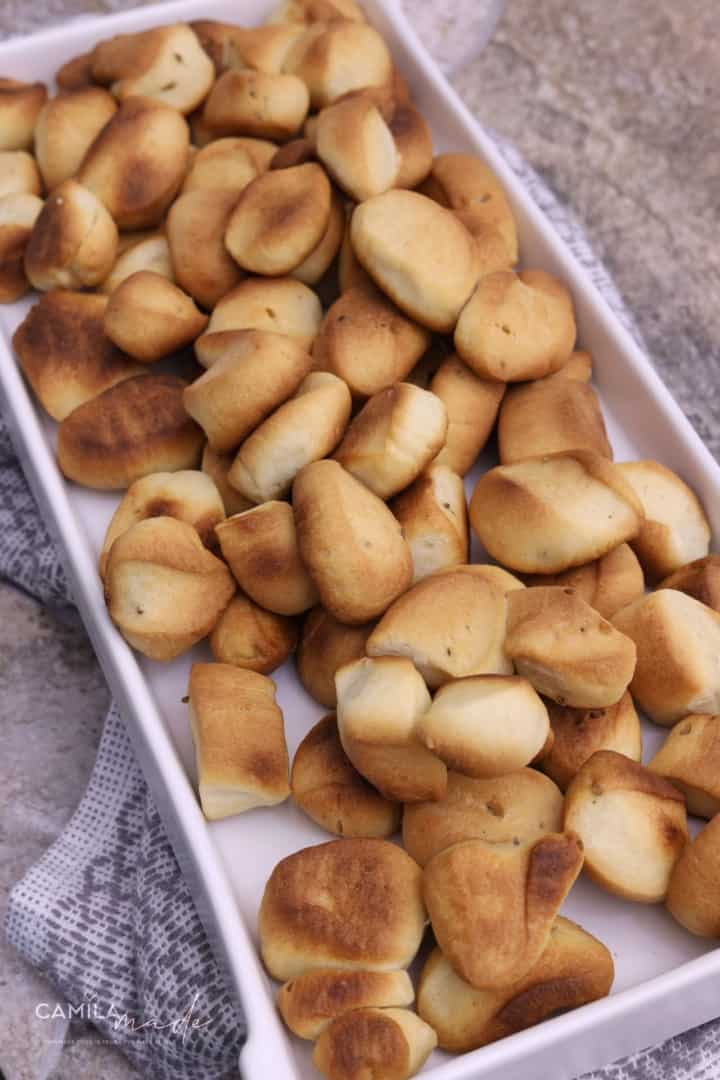
Coquito Paraguayo is similar to Italian Grissini and is a staple of Paraguayan cuisine. Its satisfyingly crisp and shattering crust makes it incredibly addictive!
This easy Coquito Paraguayo makes a lovely, perfect companion to any meal. Whether enjoyed with a morning cup of mate cocido or as a standalone snack, the key to its deliciousness is baking it until it's perfectly toasted for the perfect crunch.
INGREDIENTS
- 1 kg bread flour or all-purpose flour
- 250 g unsalted or salted butter or margarine , room temperature
- 10 g instant dry yeast
- 50 g granulated white sugar
- 20 g kosher salt
- 6 g anise seeds (Optional)
- 5 g Malt Syrup or honey , we used Eden Organic Barley Malt Syrup
- 500 ml (approx.) warm water (110ºF-115ºF)
How to Make Coquito Paraguayo
-
Preheat your oven to 400°F (200°C).
-
Line two 13'' x 18'' baking sheets with parchment paper.
-
In a stand mixer bowl with the dough hook attachment, combine the flour, salt, sugar, anise seeds, and instant dry yeast.
-
Pour warm water, softened butter, salt, and malt syrup (if using) into the dry ingredient mixture.
-
Mix on low speed for 4 minutes. Then, increase the speed to medium and mix for an additional 3 minutes. Continue mixing on medium speed until the dough forms a firm but elastic consistency and pulls away from the side of the mixer bowl. ⚠️👉 (At this point, the mixer should be running at medium speed; a high speed would work the dough too roughly, breaking the structure of the gluten rather than promoting its development.)
-
Lightly oil a bowl and your hands, then transfer the dough into it. Briefly push the dough into itself to form a smooth ball. Cover the bowl with a kitchen towel or plastic wrap and let the dough rest for 15 minutes.
-
After the dough has risen, punch it down to release the air. Divide the dough into 2 equal pieces. Keep one piece covered while working with the other to prevent drying out.
-
Roll out one piece of dough on a large work surface until it's about ½ inch thick. Cut the dough into strips approximately 1 inch wide. Take each strip and roll it under both hands until it's about ½'' to ¾'' in diameter and 13 inches long. Trim the ends and cut the dough diagonally into 1-inch pieces.
-
Bake until golden brown and dry to the touch, about 15 to 20 minutes, switching the pans halfway through. Once baked, remove the coquitos from the oven and let them cool completely on the pan.
How to Store
Coquitos remain fresh and crispy for a week when stored in an airtight container or sealed plastic bag.
Make-Ahead
Prepare Paraguayan breadstick dough ahead by refrigerating it tightly wrapped in plastic for up to 24 hours. Prior to baking, let the dough sit at room temperature for 15-20 minutes. Proceed with recipe instructions for shaping and baking
MBEJÚ
Mbejú, a staple of Paraguayan cuisine, is made with tapioca starch, milk (or water), salt, and Queso Paraguay. These ingredients are mixed together to create a crumbly dough.
The dough is then crumbled into a hot pan, covering the bottom entirely, and pan-fried until golden and crisp. Mbejú is perfectly complemented when served with hot mate cocido.
Ingredients
- P
INSTRUCTIONS
-
In a 2-cup liquid measuring cup, combine the milk and kosher salt. Stir until the salt is completely dissolved. Set aside.
-
In a large bowl, combine the yuca starch, salt, cheese, and softened butter. Using your hand, mix until the ingredients form a crumbly texture.
-
Gradually add milk, a little at a time, while mixing continuously until the mixture resembles a coarse crumble with only a few larger pieces. The mixture should be moist but still crumbly. You may not need to use all the milk. Make sure the dough remains loose and not fully combined.
-
Heat 1 tablespoon of unsalted butter in a 9-inch frying pan over medium heat. Swirl the melted butter around the pan until it starts to turn golden brown.
-
Evenly sprinkle about 2 cups of the crumble mixture into the pan and spread it with the back of a spoon, ensuring it covers the bottom of the pan entirely. The layer should be neither too thick nor too thin.
-
Using a spoon, gently spread the mixture evenly, pressing only the edges to flatten them. Cook for 4-5 minutes until the bottom is crispy and golden brown and releases easily from the pan. Move the pan occasionally to ensure even cooking and prevent burning.
-
Carefully flip the Mbejú and cook for another 4 to 5 minutes on the other side or until crispy and golden brown. Transfer the cooked Mbejú to a plate or sheet pan and cover with a clean kitchen towel to keep warm.
-
Repeat the process with the remaining crumble mixture, adding more unsalted butter to the pan as needed until all the Mbejú is cooked.
- Budin de Navidad
- Pastel Mandio
- Bife Koygua
- Cocido Quemado
- Mandio Chyryry
- Locro
- Mate Dulce
- Terere
- Mate
- Galleta Cuartel
- Galleta Paraguaya
- Pan Trincha
- Soyo Paraguayo
- Guiso de Arroz
- Guiso de Fideo
- Tallarin
- Puchero
- Caldo de Poroto
- Vori Vori de Carne
- Vori Vori de Pollo
- Pira Caldo
- Chupi de Pescado
- Madioca
- Mandioca Frita
- Asado a la Olla
- Empanadas de Carne
- Empanada de Pollo
- Empanadas de Choclo
- Empanada de Jamon y Queso
- Sandwich de Verduras
- Milanesa de Carne
- Milanesa de Pollo
- Milanesa de Pescado
- Marinera de Carne
- Bollo Paraguayo
- Mbaepy Hee
- Pireca
- Alfajores
- Pasta Frola
- Churros
- Medialunas
- Pionono de Dulce de Leche
- Andai Kamby
- Dulce de Mamon
- Mazamorra
- Crema de Vainilla
- Arroz con Leche
- Dulce de guayaba
- DUlce de batata
- Boqueron
- Kai Ladrillo
- Budin de Pan
- Flan
- Rosquitas
- Palitos
- Reviro
- Ensalada de Fruta
- Clerico
- Asado
- Vacio
- Ensalada de Poroto
- Ensalada Rusa
- Ensalda de Arroz
- Butifarra
- Chicharron
- Caldo Ava
- Mbeju Mestizo
- Payagua mascada
- Croqueta de Carne
- Croqueta de Pollo
- Pastelon de Papa
- Omele de Papa
- Arroz Quesu
- Noquis de Papa
- Jopara
- Soo apua
- Caldo de pollo
- Kiveve de calabaza
- Carrulin
- kure chyryry
- pan casero
- pan dulce or masita roja
- Estofado de carne
- mani con miel de cana
- Kosereva (dulce de naranja agria)
- Fideo a la Manteca
- Torta de Zanahoria
- Chipa Ryguazu
- Bife de Higado
- Chipa Pireca
- Jukysy
- Batifurrillo
- Arroz Quesu
- So'0 Apua
- Kiveve
- Payagua Mascada
- Queso Paraguayo
- Peceto al Horno
- Chicharron trenzado
- Siriki Sanjuanino
- Kumanda Quesu
- Ka'i Ku'a
