Easy Vanilla Cake
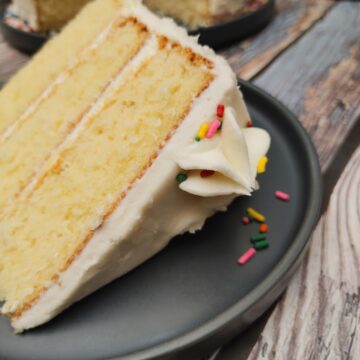
My Vanilla Cake recipe is the ultimate dessert for vanilla lovers. It's flavored with a blend of different types of vanilla and then generously frosted with creamy buttercream that has also been enriched with different kinds of vanilla- making it the perfect birthday cake! 🎂
Tools
Ingredients
For the Vanilla Cake
- 375 g (3 cups) all-purpose flour spooned and leveled off with the back of a knife
- 1 teaspoon baking soda
- 1 teaspoon non-aluminum baking powder
- 170 g (1 stick plus 4 tablespoons) unsalted butter , room temperature
- 60 ml (¼ cup) avocado oil or grapeseed oil
- 5 large eggs room temperature
- 1 cup evaporated milk or whole milk , at room temperature
- ½ teaspoon kosher salt
- 400g (2 cups) granulated sugar
- 15 ml (1tablespoon) pure vanilla extract
- 15 ml (1tablespoon) clear vanilla flavor ,
- ½ vanilla bean (seeds scraped off)
For the Buttercream:
- 750 g (6 cups) confectioners' sugar
- 1 tablespoon Dry whole milk , such as Nido Brand
- 336 g (3 sticks) unsalted butter , softened
- 2 teaspoons pure vanilla extract
- 1 teaspoon clear vanilla
- 4 ounces cream cheese , softened
- ½ vanilla bean (seeds scraped off)
- ⅛ teaspoon kosher salt
- Rainbow jimmies and Wilton 1 M tip for decoration.
Instructions
- Preheat Oven and Prepare Pans: Preheat the oven to 350°F (175°C). Grease and flour three 9-inch round cake pans, tapping out any excess flour.
- Sift Dry Ingredients: Sift the flour, baking powder, and baking soda into a large bowl. Set aside.
- Cream Butter and Sugar: In an electric mixer fitted with the paddle attachment, beat the butter, oil, salt, and sugar on high speed until light and fluffy, about 5 minutes.
- Add Eggs and Vanilla: With the mixer on low, add the eggs one at a time, scraping down the bowl after each addition. Mix in the pure vanilla extract, clear vanilla flavor, and vanilla bean seeds until well combined.
- Combine Dry and Wet Ingredients: Alternately add the dry ingredients and evaporated milk to the batter in three parts, beginning and ending with the dry ingredients. Mix until just combined, taking care not to overmix.
- Bake: Divide the batter evenly among the prepared pans. Bake for 25 to 30 minutes or until a toothpick inserted in the center comes out clean.
- Cool: Let the cakes cool in the pans on racks for 15 minutes, then invert them onto the racks, remove the parchment paper, and cool completely.
How to Make Vanilla Buttercream
- Sift Sugar and Milk: Sift together the powdered sugar and powdered milk to remove lumps. Set aside.
- Cream Butter and Cream Cheese: In a large bowl of a stand mixer fitted with the paddle attachment, beat the softened butter, cream cheese, pure vanilla extract, clear vanilla, seeds from the vanilla bean, and salt until the mixture is smooth and well combined.
- Add Powdered Sugar Mixture: Gradually beat in the confectioners' sugar mixture. Once fully incorporated, increase the speed to medium-high and beat until the frosting is light and creamy, about 2 to 3 minutes. If needed, add a tablespoon or more of cream or milk to achieve your desired consistency. Be careful not to overbeat; the frosting should be spreadable but not runny. Reserve about ⅓ cup of the buttercream for decoration.
- Assemble the Cake: Place one layer of the vanilla cake on a cake stand or platter. Spread a generous cup of buttercream over it, then add the second layer and repeat. Top with the final cake layer. Use the remaining frosting to cover the top and sides of the cake. Decorate with rainbow jimmies and use the reserved frosting in a piping bag fitted with a Wilton 1M tip to create your desired pattern on top of the cake.
- Camila's Tip: To extract seeds from vanilla beans, split them lengthwise and scrape out the seeds with the back of a paring knife.
Notes
How to Store
This Vanilla Cake with Vanilla Buttercream Frosting can be refrigerated airtight for up to 3 days; remove it from the fridge about 15 to 30 minutes before serving to allow the buttercream frosting to warm up and lose its chill. Plain vanilla cake without buttercream frosting can be refrigerated in an airtight way for up to 5 days; remove it from the fridge about 15 to 30 minutes before serving to allow the vanilla cake to warm up and lose its chill.
Vanilla Buttercream Frosting can be refrigerated airtight for up to 5 days; remove it from the fridge for about 30 minutes to 1 hour before decorating the vanilla cake to allow the buttercream frosting to warm up and lose its chill.
Make-Ahead
To make the Vanilla Cake ahead of time, you can bake the cake layers in advance and store them at room temperature for up to 2 days or refrigerate them for up to 5 days. Once the cake layers are completely cooled, wrap them tightly in plastic wrap to prevent them from drying out. The buttercream frosting can also be made ahead of time and stored in an airtight container in the refrigerator for up to 3 days.
When you're ready to assemble the cake, bring the frosting to room temperature and give it a good stir or re-whip it briefly to restore its creamy texture. Frost the cake as directed in the recipe; if desired, add the decorative touches just before serving. The assembled cake can be kept covered in the refrigerator for up to 5 days. Remember to bring it to room temperature before serving for the best taste and texture.
How to Freeze
It's best to freeze the vanilla cake before assembling it with the buttercream frosting. Once the cake layers have completely cooled, wrap each layer individually in plastic wrap, followed by a layer of aluminum foil to prevent freezer burn. Place the wrapped cake layers in a freezer-safe container or zip-top bag and label them with the date. The cake layers can be frozen for up to 3 months.
When ready to use them, thaw the cake layers in the refrigerator overnight. Once thawed, you can assemble the cake and frost it with the buttercream as per the recipe instructions. Freezing the cake layers separately helps retain their freshness and makes it easier to frost and decorate when you're ready to serve.
Notes:
- Spoon flour into a dry measuring cup and level off the excess with the back of a knife. (Scooping directly from the bag compacts the flour, resulting in a dry cake.)
- This vanilla cake gets its flavor from pure vanilla extract and clear vanilla. The vanilla cake layers can be made a day ahead; wrap the cooled layers in plastic and aluminum foil and store them at room temperature overnight.
- You can also assemble and frost the vanilla cake the day before serving, cover it with a cake dome, and refrigerate it overnight. Let it stand at room temperature for at least 1 hour before serving.
- You can make a homemade sour milk substitute if you don't have buttermilk. Pour 1 cup of whole milk into a liquid measuring cup and stir in 4 teaspoons of lemon juice or vinegar. Let the mixture stand for 10 minutes. The acid will curdle the milk slightly.
- The recipe works in a 9×13-in cake pan, bundt, or 24 cupcakes. However, cooking time will vary.
Nutrition Facts
Easy Vanilla Cake
Amount per Serving
Calories
713
% Daily Value*
Fat
22
g
34
%
Saturated Fat
11
g
69
%
Trans Fat
0.5
g
Polyunsaturated Fat
2
g
Monounsaturated Fat
8
g
Cholesterol
120
mg
40
%
Sodium
323
mg
14
%
Potassium
112
mg
3
%
Carbohydrates
122
g
41
%
Fiber
1
g
4
%
Sugar
96
g
107
%
Protein
-12
g
-24
%
Vitamin A
626
IU
13
%
Calcium
78
mg
8
%
Iron
2
mg
11
%
* Percent Daily Values are based on a 2000 calorie diet.
All nutritional information is based on third-party calculations and is only an estimate. Each recipe and nutritional value will vary depending on the brands you use, measuring methods, and portion sizes per household.
Did you Like the Recipe?We would appreciate it if you could rate it. Also, make sure to check out our Youtube Channel for more great recipes. Please share it on social media and tag us so we can see your delicious creations. Thank you!