Easy Vanilla Glaze
Get ready to take your desserts to the next level with our incredibly delicious Vanilla Glaze. This simple yet exquisite recipe will add a touch of sweet perfection to your favorite baked goods. With just a few basic ingredients, you can create a smooth and velvety glaze that will make your treats irresistible.
Tools
- Whisk or fork
Ingredients
- 1 Cup Confectioners' sugar ; we recommend sifting after measuring for a smooth result.
- 2 to 3 Cream or Whole Milk
- 1 teaspoon vanilla extract or the seeds scraped from ¼ of a vanilla bean
- 1 teaspoon unsalted butter, melted and cooled , optional
- 1 teaspoon dry milk powdered , optional
Instructions
- In a medium-sized mixing bowl, combine confectioners' sugar. Then, add dry milk powder to the bowl. This optional ingredient will contribute to a creamier texture.
- Begin mixing the ingredients together using a whisk or fork until the mixture starts to come together and becomes smooth. Make sure to break up any lumps in the confectioners' sugar. Add melted unsalted butter, vanilla extract, or the seeds scraped from ¼ of a vanilla bean to the bowl, then gradually add milk or cream to the mixture, adding a small amount at a time while continuing to whisk. Add just enough liquid to achieve your desired glaze consistency.
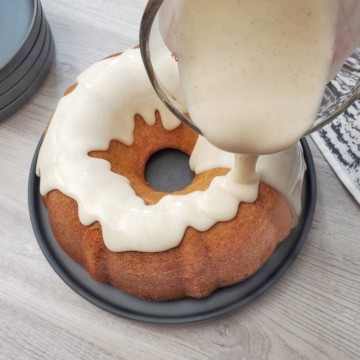
- The glaze should be pourable but still thick enough to coat the back of a spoon. Keep whisking until the glaze is well combined, smooth, and free of any lumps or clumps. The vanilla glaze is now ready to use! Pour or drizzle it over your cooled cakes, pastries, donuts, or any other desserts you desire.
Notes
How to Store & Re-Heat
- Storage: Once the vanilla glaze is prepared, let it cool to room temperature. Transfer the glaze to an airtight container, such as a jar or a sealed plastic container. Make sure the container is clean and dry before storing the glaze. The glaze can be kept in the refrigerator for up to 5 days.
- Reheating: When it's time to use the stored glaze or if the glaze has thickened in the refrigerator, you can reheat it to restore its pourable consistency. Here are a couple of methods to reheat the glaze:
- Microwave: Transfer the desired amount of glaze to a microwave-safe bowl or measuring cup. Heat it in short intervals, stirring well after each interval, until the glaze reaches the desired temperature and becomes smooth and pourable again. Be cautious not to overheat the glaze, as it can become too thin or develop a grainy texture.
Stovetop: Place a heatproof bowl or saucepan over low heat and transfer the desired amount of glaze into it. Gently warm the glaze, stirring constantly, until it reaches the desired consistency. Remove it from the heat immediately to avoid overheating.
Consistency Adjustment: If the glaze becomes too thick after reheating, you can gradually add a small amount of milk or cream to thin it out. Stir well until you reach the desired consistency. If it becomes too thin, you can add a little powdered sugar and whisk until it thickens slightly.
Nutrition Facts
Easy Vanilla Glaze
Amount per Serving
Calories
73
% Daily Value*
Fat
5
g
8
%
Saturated Fat
3
g
19
%
Trans Fat
0.2
g
Polyunsaturated Fat
0.2
g
Monounsaturated Fat
1
g
Cholesterol
16
mg
5
%
Sodium
20
mg
1
%
Potassium
76
mg
2
%
Carbohydrates
127
g
42
%
Sugar
3
g
3
%
Protein
1
g
2
%
Vitamin A
174
IU
3
%
Vitamin C
0.4
mg
0
%
Calcium
49
mg
5
%
Iron
0.02
mg
0
%
* Percent Daily Values are based on a 2000 calorie diet.
All nutritional information is based on third-party calculations and is only an estimate. Each recipe and nutritional value will vary depending on the brands you use, measuring methods, and portion sizes per household.
Did you Like the Recipe?We would appreciate it if you could rate it. Also, make sure to check out our Youtube Channel for more great recipes. Please share it on social media and tag us so we can see your delicious creations. Thank you!